The Usual Suspects: Pests and Challenges, Part I

I planted several beds of flowers to attract beneficial insects; to pollinate and to feed on pest insects.
The 2014 season has started off with the usual pests: flea beetles, cucumbers beetles, gophers and voles. One common pest that has not made much of an appearance, due to the dry weather is slugs. I am not complaining, since they will probably come back with a vengeance when the fall rains arrive.
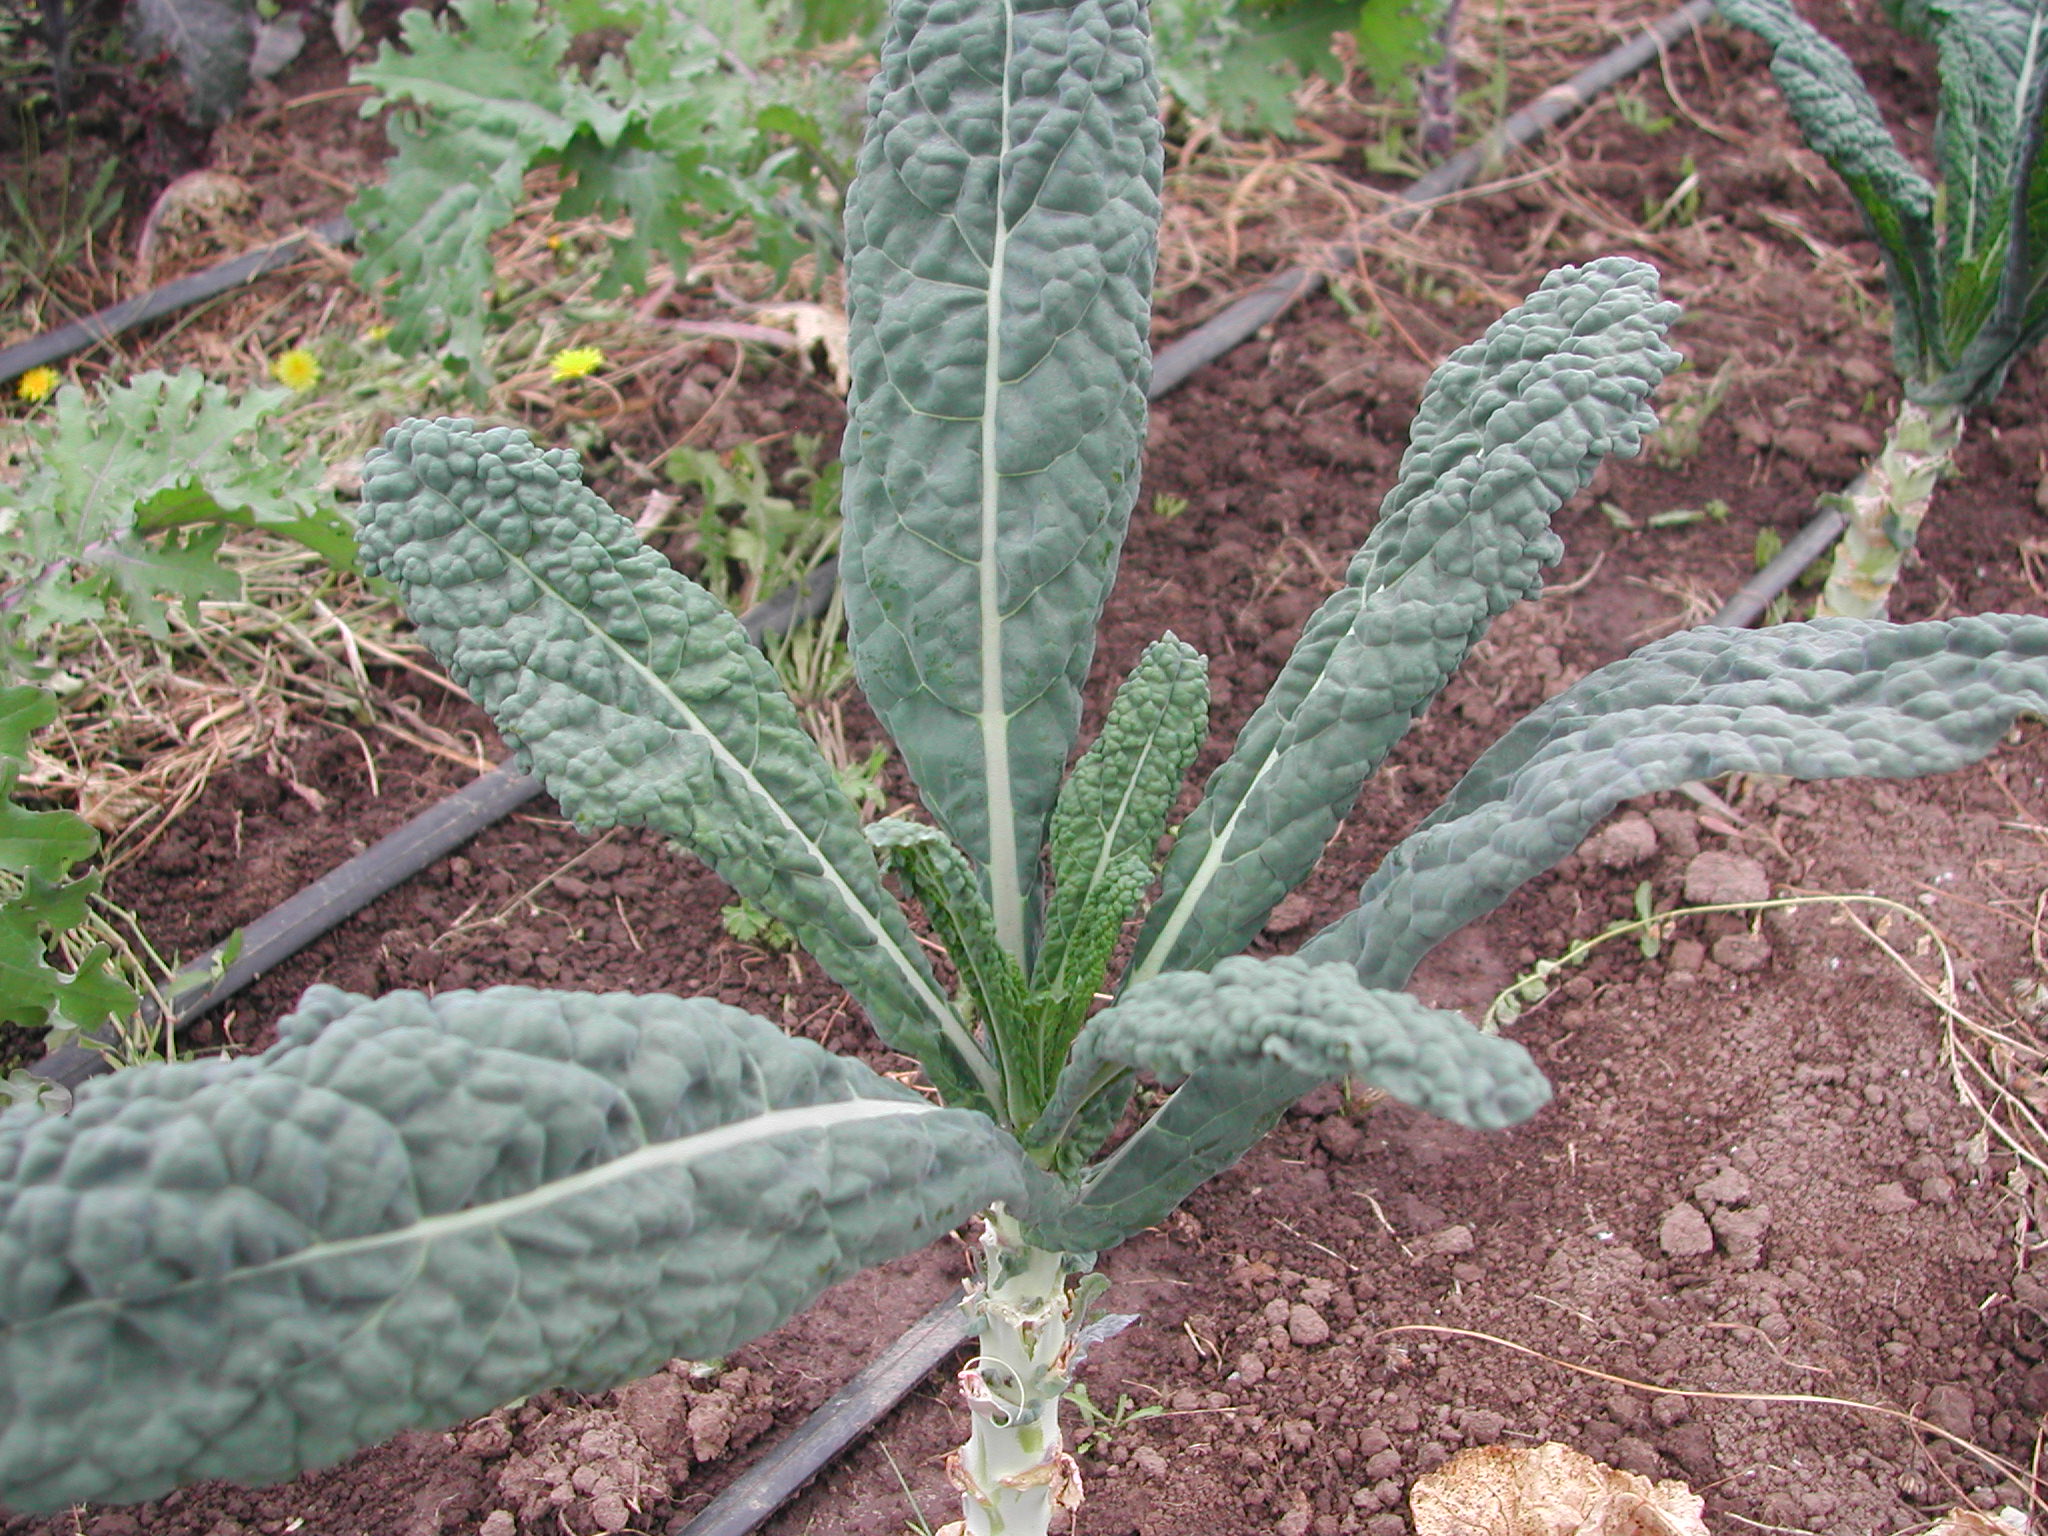
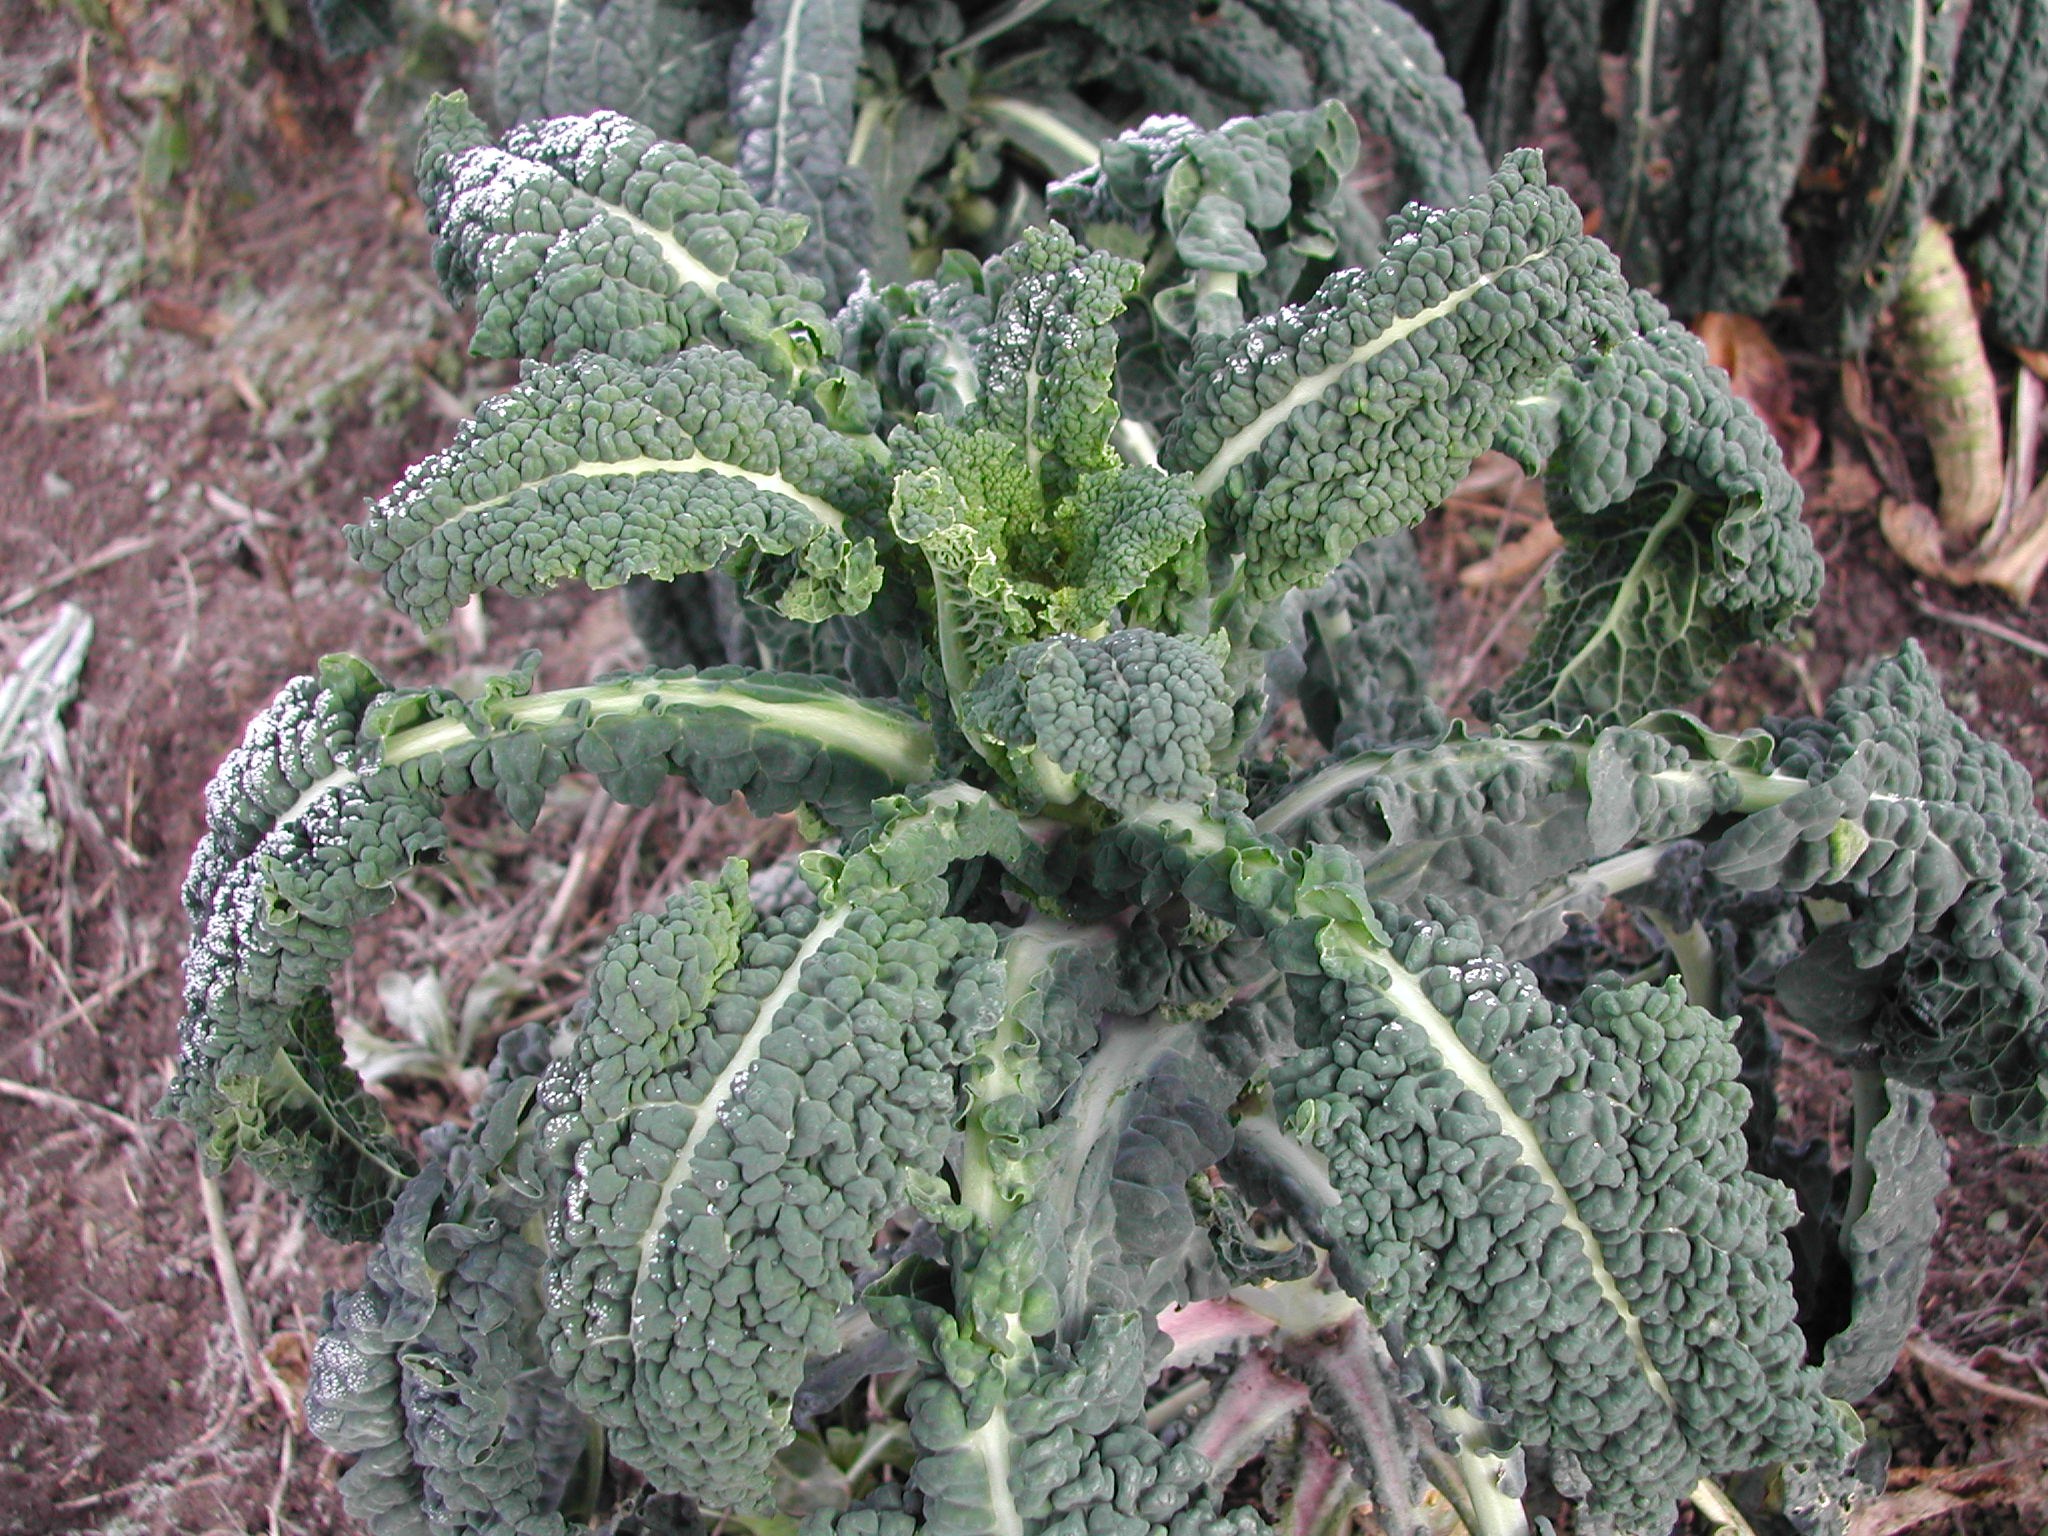
Beautiful, unblemished Lacinato kale
Flea beetles love arugula and mustard greens and will chew tiny holes in the leaves of plants. Don’t’ they know we want to eat the leaves without any holes? The way to prevent flea beetles from eating the leaves is to cover them up with floating row cover. When we planted out the arugula, mizuna, Pink Lettucy and Vivid Choi, we did just that. It worked great for the Pink Lettucy and Vivid Choi, but the row cover we put over the mizuna and arugula had some small holes. You just can’t have ANY holes in the row cover, because those flea beetles will find them and get to the plants. That is exactly what happened. The arugula and mizuna were destroyed by the flea beetles. I was also concerned about the kale, since the flea beetles got to it last year. We covered that up with floating row cover and when we uncovered it to start harvesting, it was beautifully untouched by the beetles. We seem to be past the peak of the flea beetles now. They do hit the tomatoes and eggplant some, but since we don’t eat the leaves, it is not so much of a problem. We’ll plant the greens again for the fall.
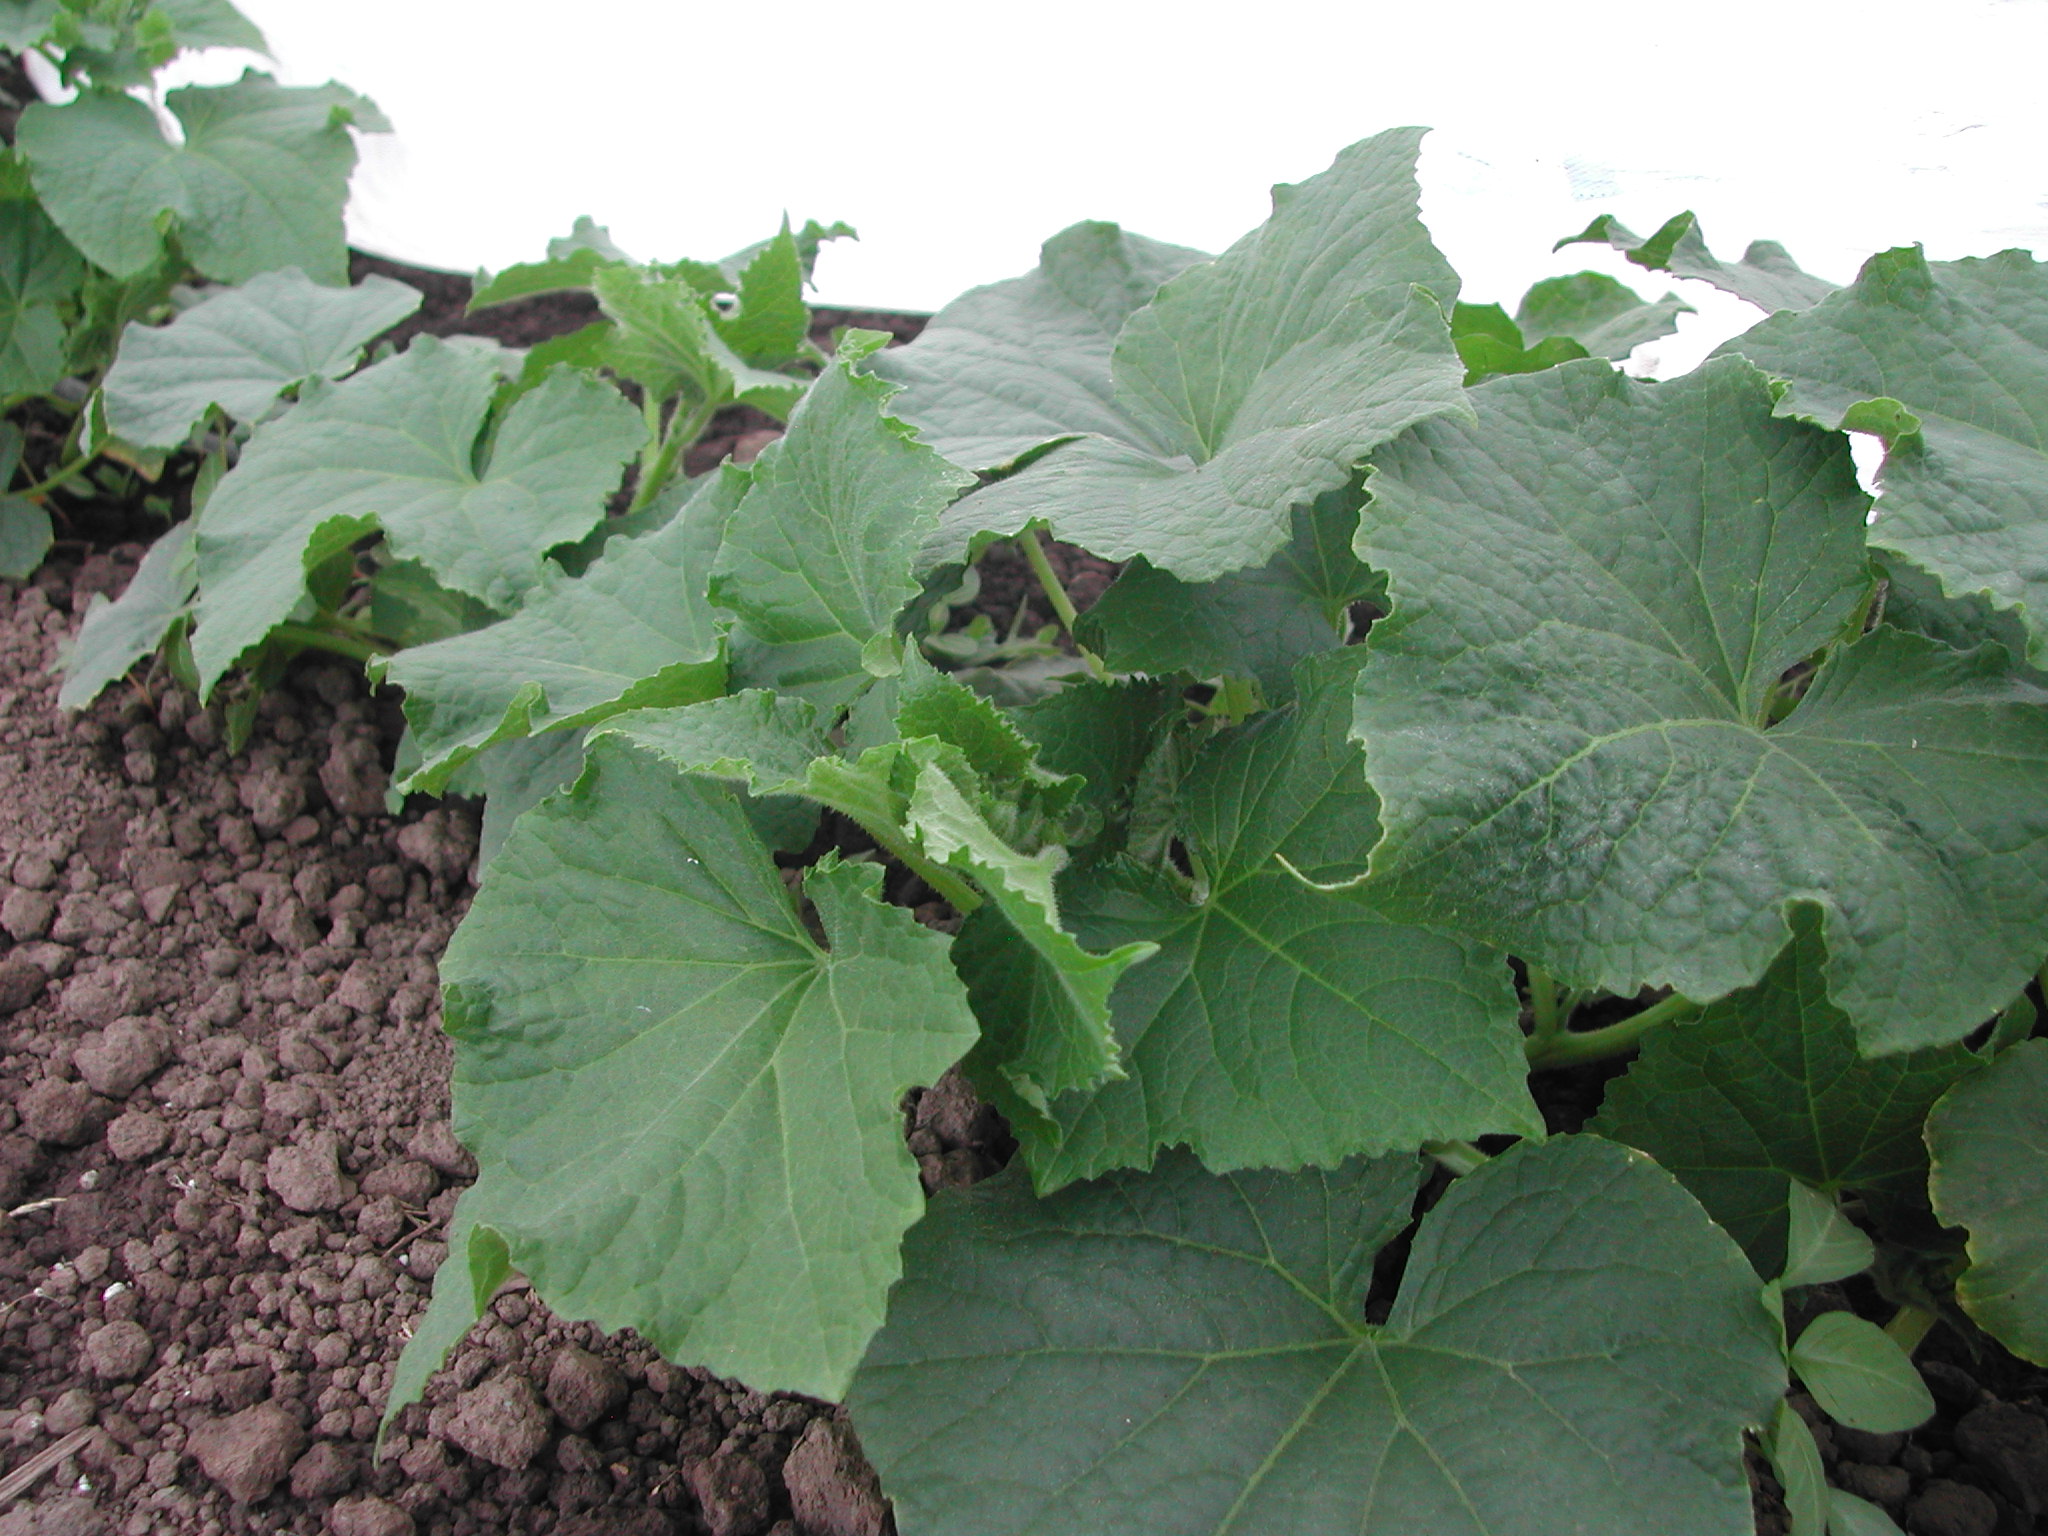
Lemon cucumbers under floating row cover
Beets and chard were the first plants hit by the cucumber beetles. There are two kinds: a spotted one, that looks something like a yellow lady bug and a striped one, that is, well, striped. The spotted ones got to the beets and chard. There would be one, maybe two beetles on a plant and I would squish whatever bugs I found. Then we put out the winter squash and the striped beetle showed up. Sometimes there were lots of beetles on one plant. I would squish as many as I could before they got away. They didn’t hit the summer squash quite as much, and just to be sure, we covered the cucumbers with floating row cover to keep them out. Now that the cucumbers are bigger, we need to take that cover off so other insects can get to the flowers to pollinate them. Last year, we lost a lot of cucumbers (the fruit itself) to the cosmetic damage the beetles do to the skin. We can only wait and see what will happen this year. I don’t know how many bugs I would have to squish to put a dent in their population.
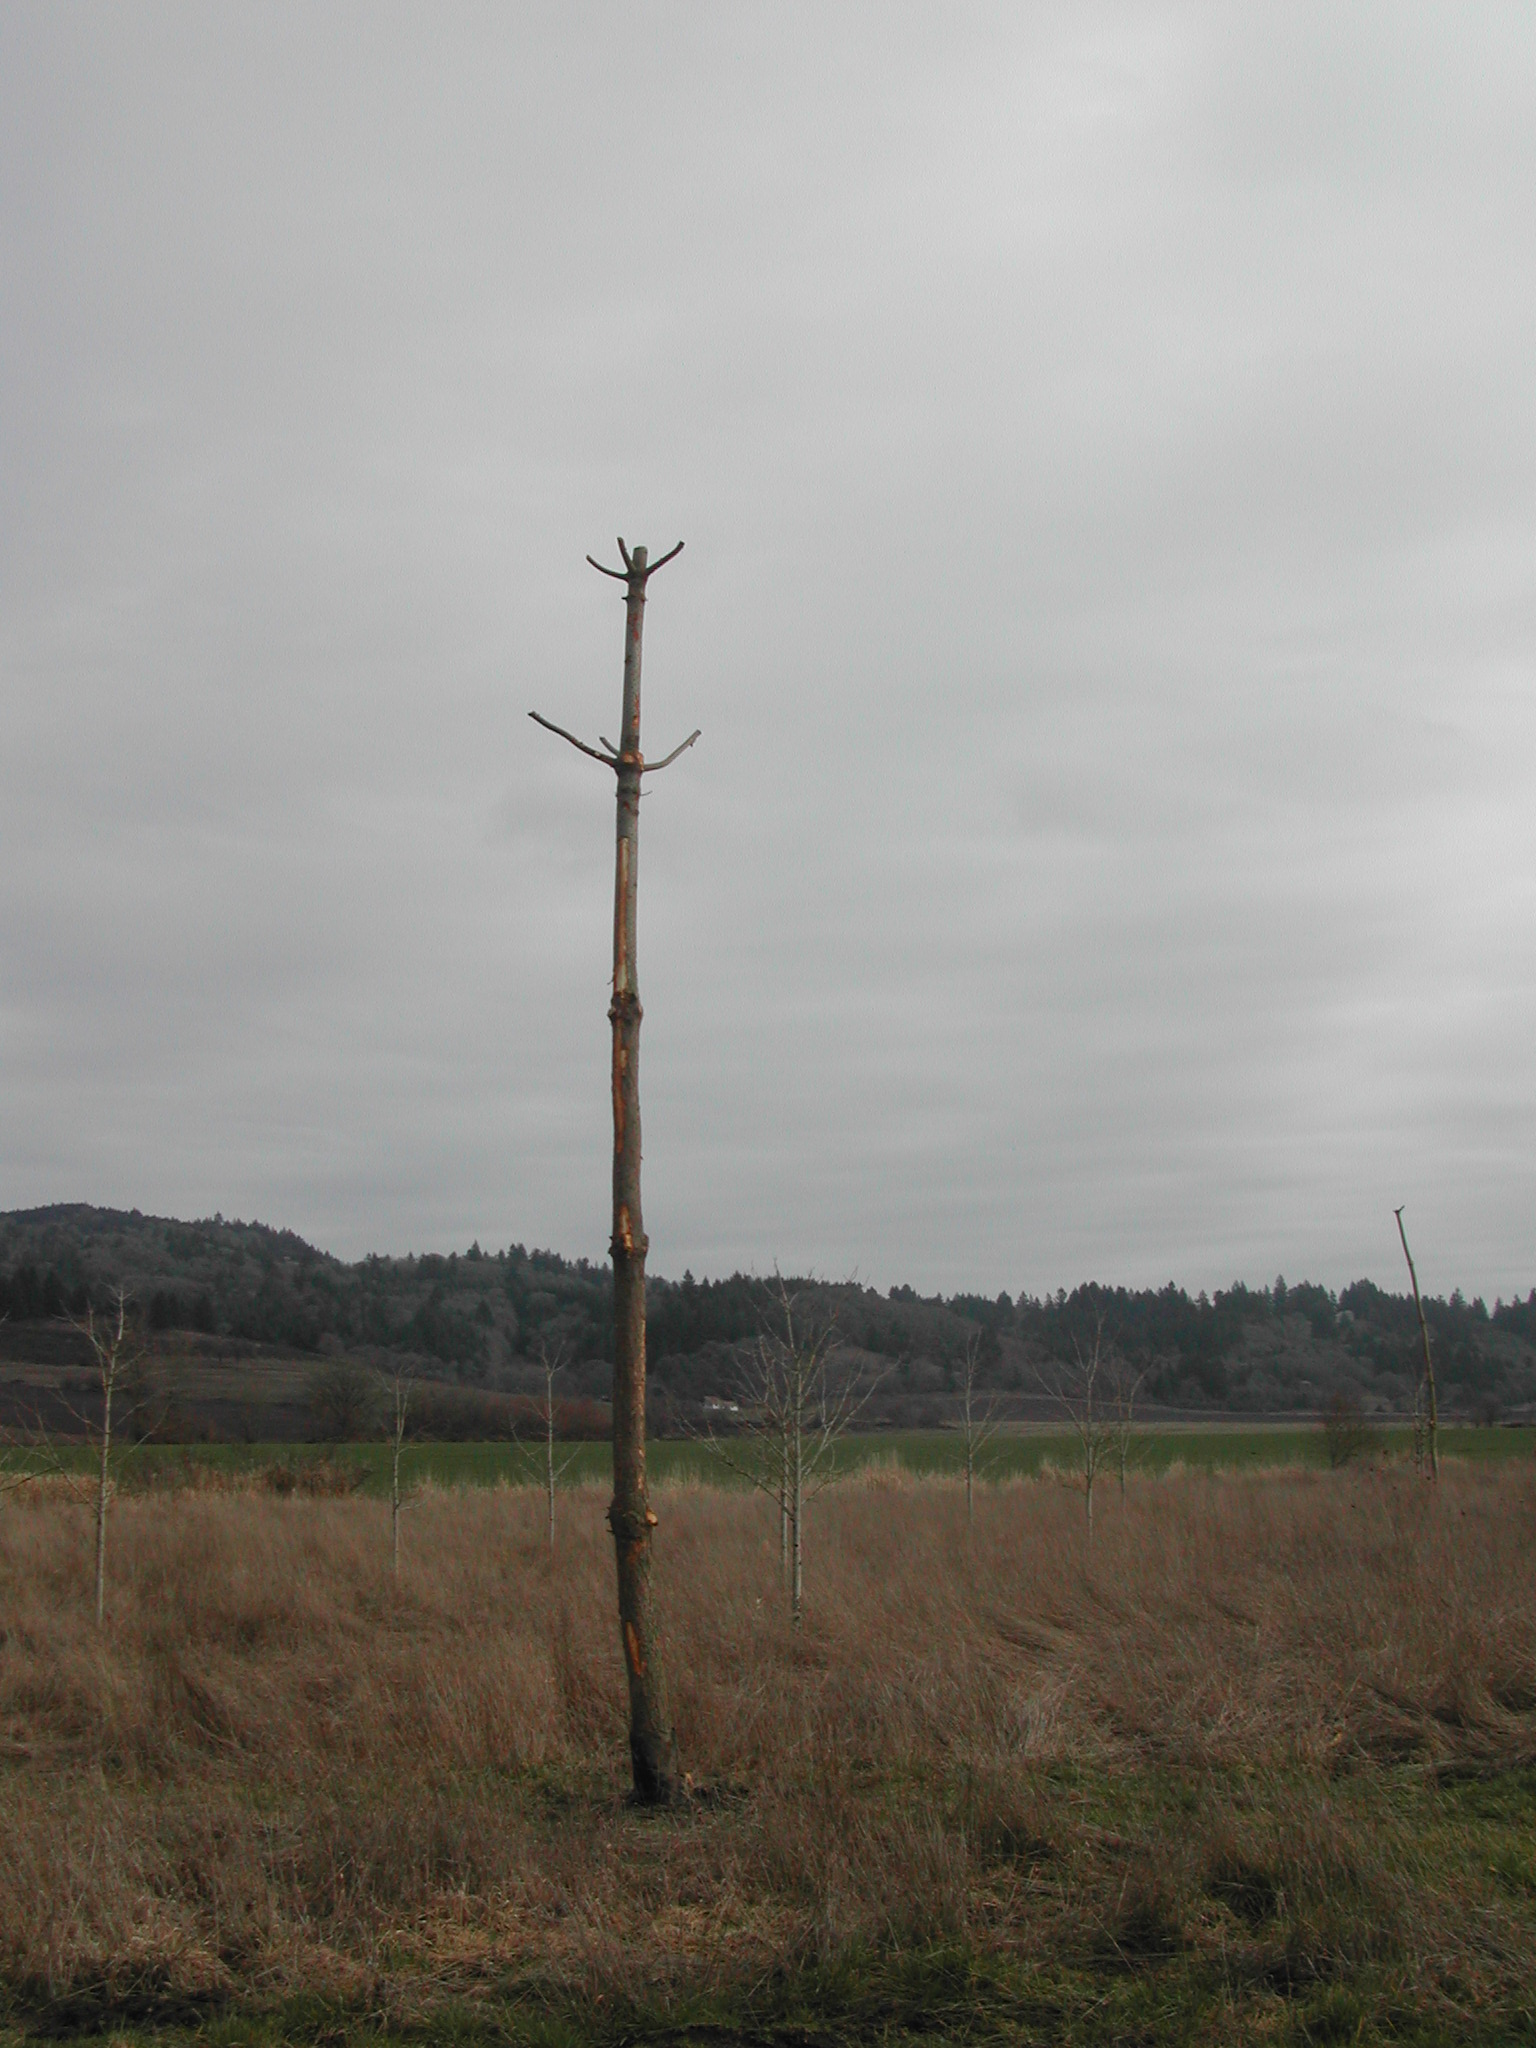
One of the raptor poles
The floating row cover works great to keep out the insects, but it gives the gophers and voles a place to hide. So far, we have had only a few incursions into the fields from gophers and voles. For these critters, we take a multi-pronged approach: trapping, Rodenating, and encouraging predators. I trapped gophers all winter, but they weren’t very active until March. To date this year, we have caught 56 in traps. Steven’s dad has been coming out to help this spring and has been using the Rodenator on the gophers and voles. It is hard to tell if it is working, but we hope it is. As for predators, first, we put up a couple poles for raptors to perch on to hunt our fields for voles. We still have more to put up, but I have to confess, I haven’t seen them used by many raptors. What I have seen are feral cats catching voles in our fields. At the end of April, we discovered a feral cat with a litter of kittens in our chicken coop….actually in the coop. The chickens were not happy, but I was. This was our chance to keep some good hunters around. We moved the kittens out of the coop into a box and started feeding the mother cat. She has stayed around with her four kittens, though she moved them out of the box. I don’t see the kittens much right now, but I see the mother cat, often with a vole in her mouth. I am hopeful.

The feral kittens at three weeks
Water
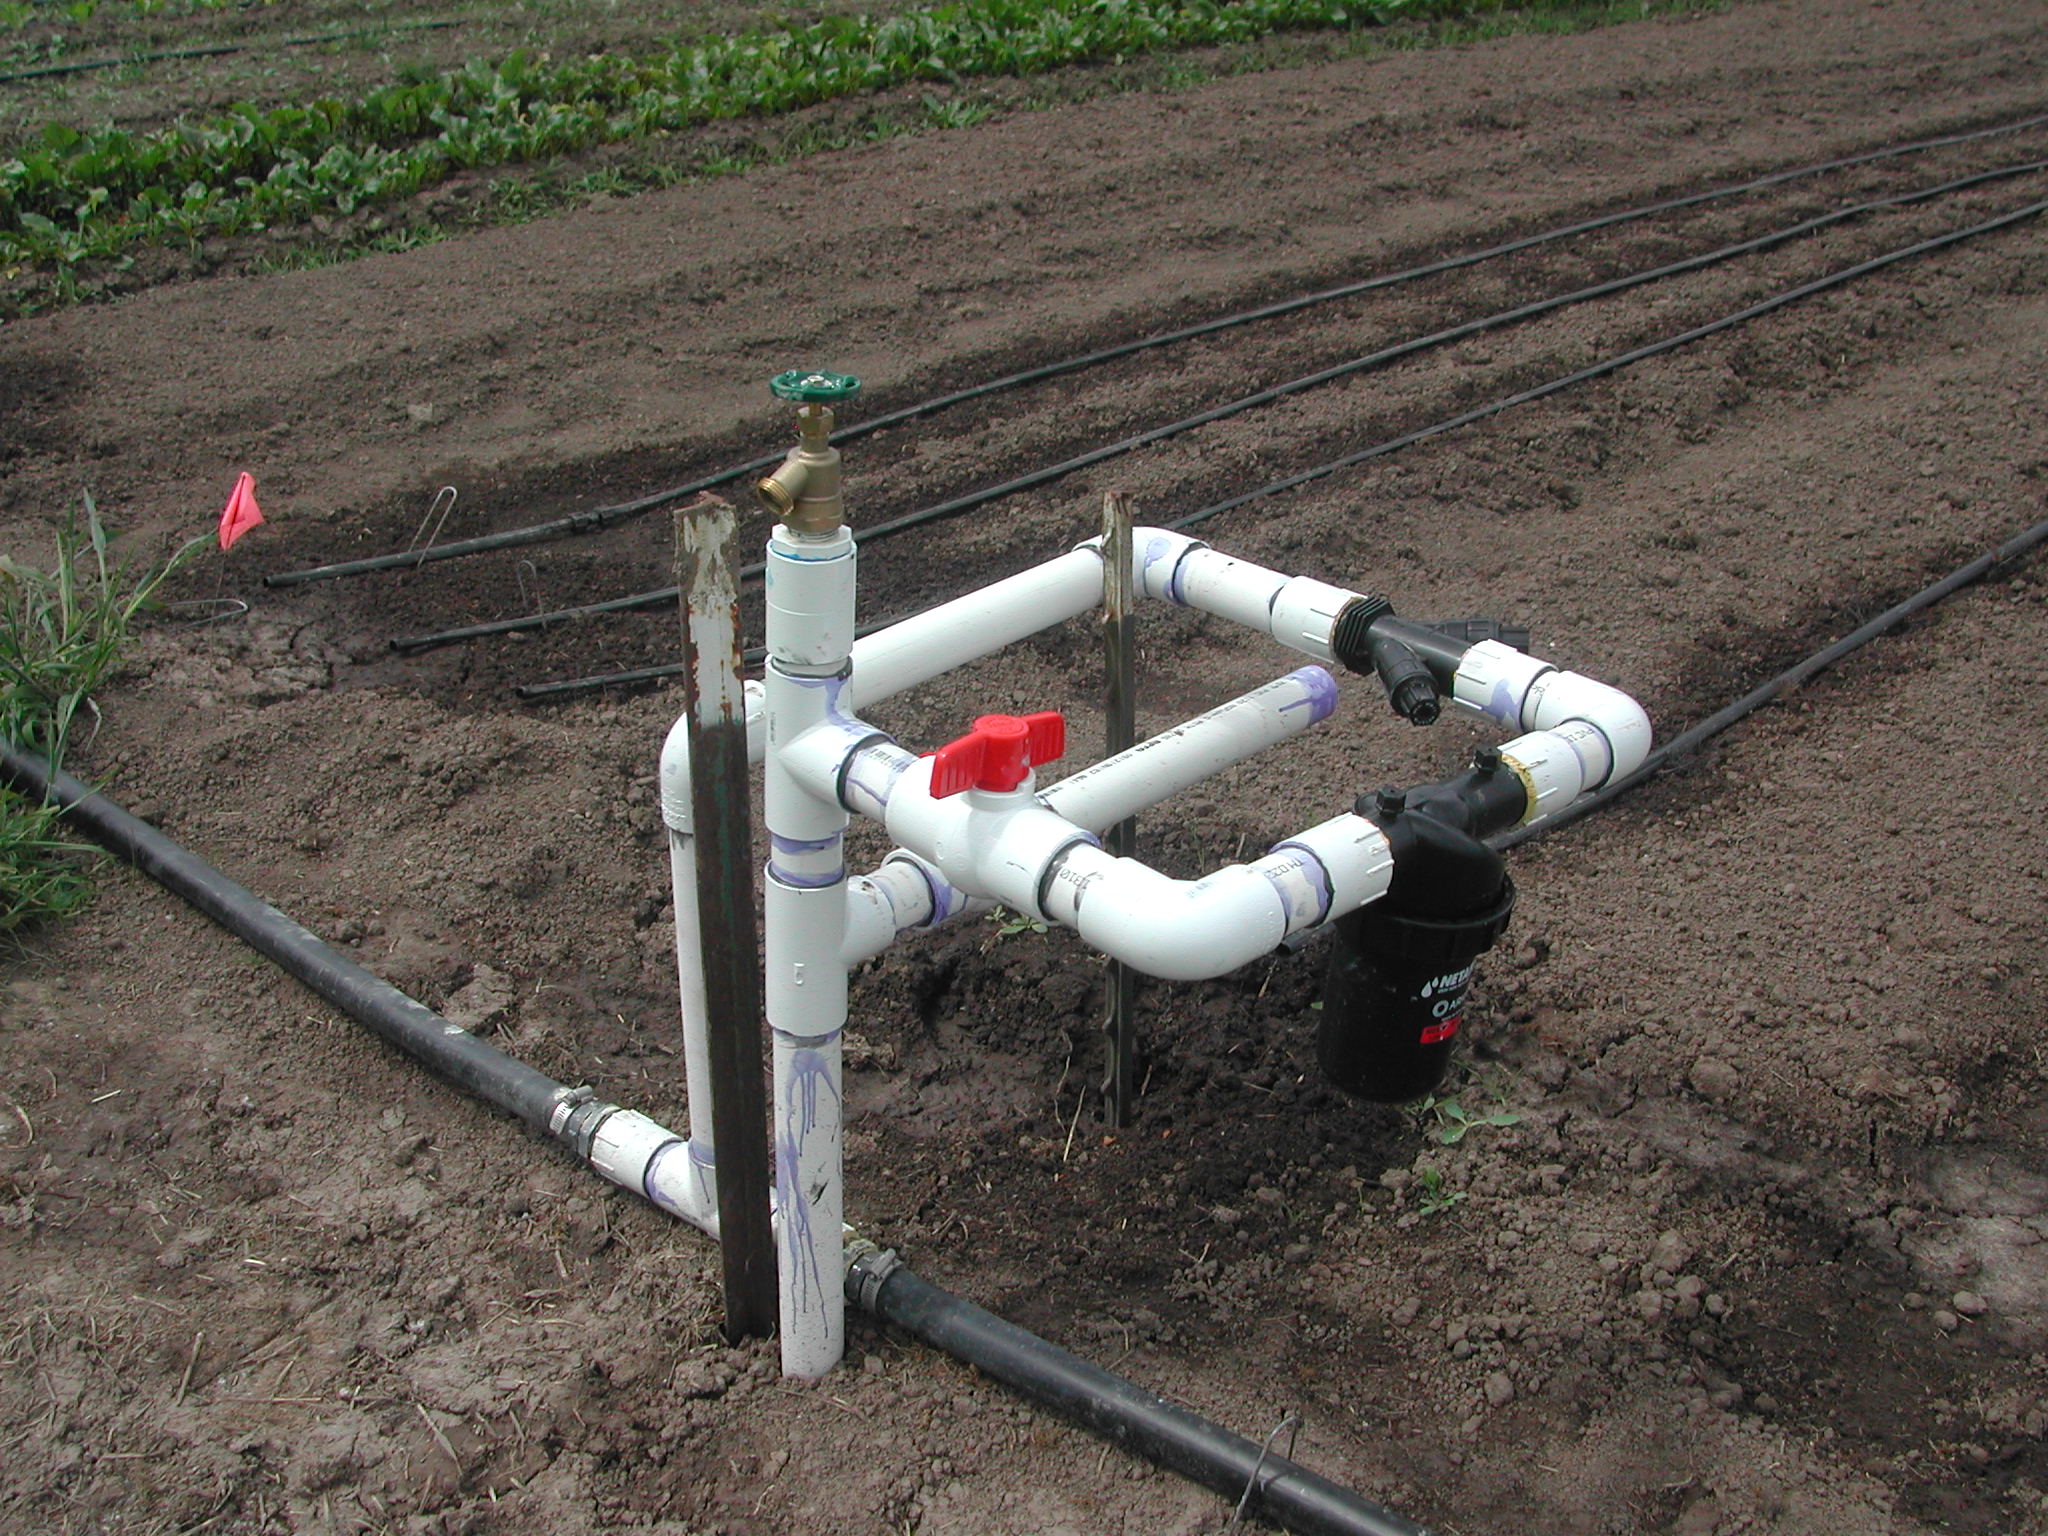
The new irrigation connection point for one of our new fields; it gives us several options for accessing water.
Even though our rainfall has been fairly average this spring (slightly above average for April and slightly below average for May, according to Accuweather), it has seemed dry. And warm. That means we need to irrigate.

Tapping into the existing pipe.
One of the things that influenced our decision to buy this farm was its irrigation infrastructure. There were pipes underground that came up at various fields around the farm. It was great last year; all we had to do was set up some above ground pipes to get the water where we wanted it. Not bad at all.

Ready to glue the pipe together
This year is a little different. We opened up two new fields; fields that had been fallow, natural area. There weren’t any underground pipes bringing water to these fields, so we would have to do it. Steven had already drawn out a plan for new irrigation lines to the new fields we would put into production. Phase I started this year. During the month of May, Steven tapped into the existing irrigation line underground and added a new section that will eventually provide water for five fields. One we used last year, two are the new ones we opened up this year, and two are waiting for future needs. Over Memorial Day weekend, the essential parts were completed and the water began to flow. And none too soon. I was more than ready to plant in those fields. In fact, I had started planting in those fields, but since I had to water with a very temporary, inadequate, jerry-rigged contraption or by hand, I could only do so much. Now the planting continues in earnest.
It is good to have water.

The end of the line; the small pipe at the end is for draining the system.
Catch Up

Cover crop in field E. Between wet soil and not needing to plant until June, we could let the cover crop grow to a nice size. We’ll mow it down this week.
I think this winter/spring is giving us a more realistic picture of what will be a typical beginning of each season on the farm. Last year was unusually dry, but this year had more average rainfall. It looks like that rain will add a few weeks of waiting for soil to dry out before we can work the fields. Luckily, we opened up two new fields this year, on higher ground, that will be our driest, earliest fields. We started planting in them around the same time as last year. (Last year’s fields will be planted later this year.) Unless there is a particularly wet spring, we will likely be starting to plant in our main fields in mid-April.

I started the summer squash in potting soil. They are ready to plant out this week.
The fields are getting planted. Some things are going in later than planned, some on time. That seems to happen. There is always some catching up to do in spring. I had a pretty big set back in the propagation hoop house this year. I had some trouble with almost all of my starts, and had to restart most of them. The best I can tell, I got a bad batch of coconut coir (the medium I have been using to start seeds) with high levels of sodium. The little seedlings did not like that. Some died and some just stopped growing. Once I transplanted the seedlings or restarted the seeds in potting soil, they did fine. I have decided I will start everything in potting soil from now on and not take the risk that that will happen again.
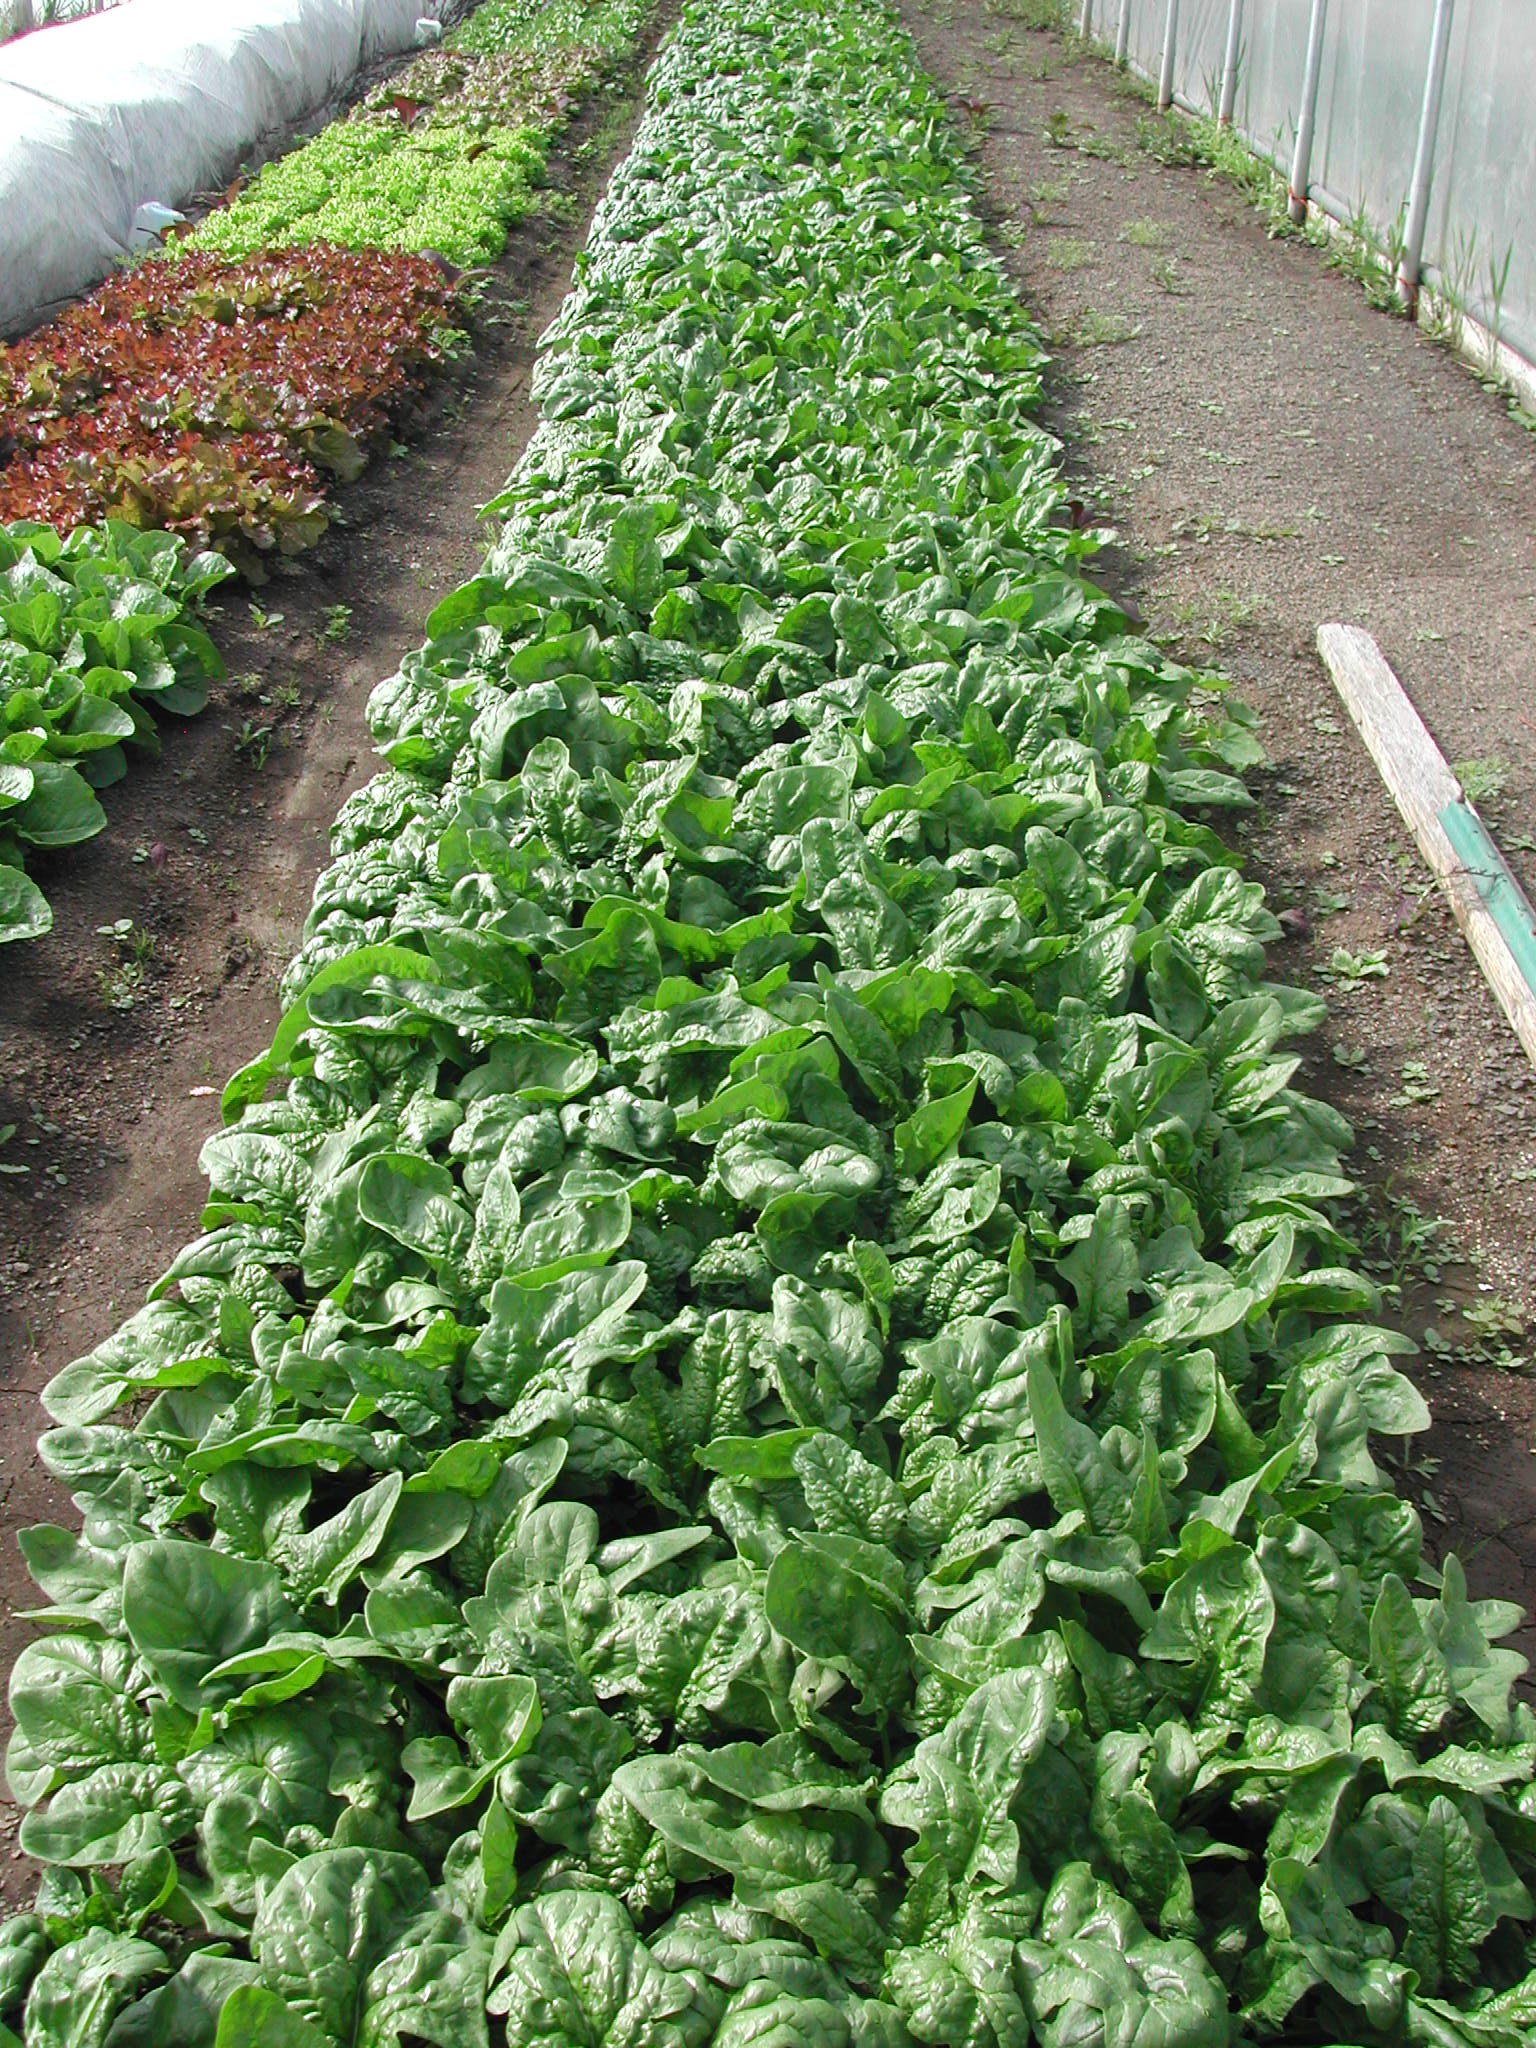
Spinach! That is lettuce beside it.
We lost two of our girls over the winter, and are now down to three chickens. One was killed by a feral cat. I heard a big ruckus outside and followed the trail of feathers to a cat sitting over our girl. It was a big cat, not one I had seen around before. It may have even been a bobcat, but I can’t be sure. Our other girl just slowed down and died. Old age, I’d say. The three hens left are 6 years old now. We do plan on getting new chicks and selling eggs, though I’m not sure how soon that will happen.
Despite what has seemed like a slow start, harvests and deliveries begin this week. The peas are blooming (just a few more weeks!) and the first lettuce and other greens are ready. Some things will be delayed, but that’s kind of how things go. Welcome to the 2014 season!

Snap pea blossoms!
A New Name!
 The farm has a new name! June’s Corner Garden is now Bethel Springs Farm!
We started thinking about a new name last winter, after we moved to Rickreall. There were a few reasons, one was that June’s Corner Garden was based on our previous location on Sauvie Island. Our corner lot had originally belonged to Steven’s grandmother, June, and when we first moved in, she still lived in the house across the street from us. It was a (relatively) small piece of land, so the term garden was very appropriate. Though we could have kept using the name, as we did last year, the farm/market garden on Sauvie Island was my baby. Out here in Rickreall, this would be Steven’s, too, and it is bigger. I think we can really call it a farm now.
It has taken us a year, but we finally came up with the name Bethel Springs Farm. The area we are located in is known as Bethel. Across the street from us is the Bethel Cemetary and down the road is the Bethel Church. Bethel is a name that is often used for churches, since it means ” house of god.” I think that works, too. When I look around me, out on the farm, I definitely think God is present on the earth.
As for the Spring part of the name, we discovered this past rainy February, that we have seasonal springs! They are located in the wettest areas of the farm and they don’t last long, but the water bubbles up out of the ground.
Farm, of course , is self explanatory.
Jonas, our nephew who stayed with us for a good part of 2012, is making a logo for us. Here it is, all the parts together in a composition:
A composite of the Bethel Springs Farm logo pictures.
So, there it is. June’s Corner Garden is now Bethel Springs Farm. Almost all of the official changes have been made (state registration, bank, etc), but I am still working on the smaller changes (bags, e-mail, blog, etc.) With where we are in the season, it may take some time for everything to change over. In any case, we welcome you to Bethel Springs Farm!
End of the Season
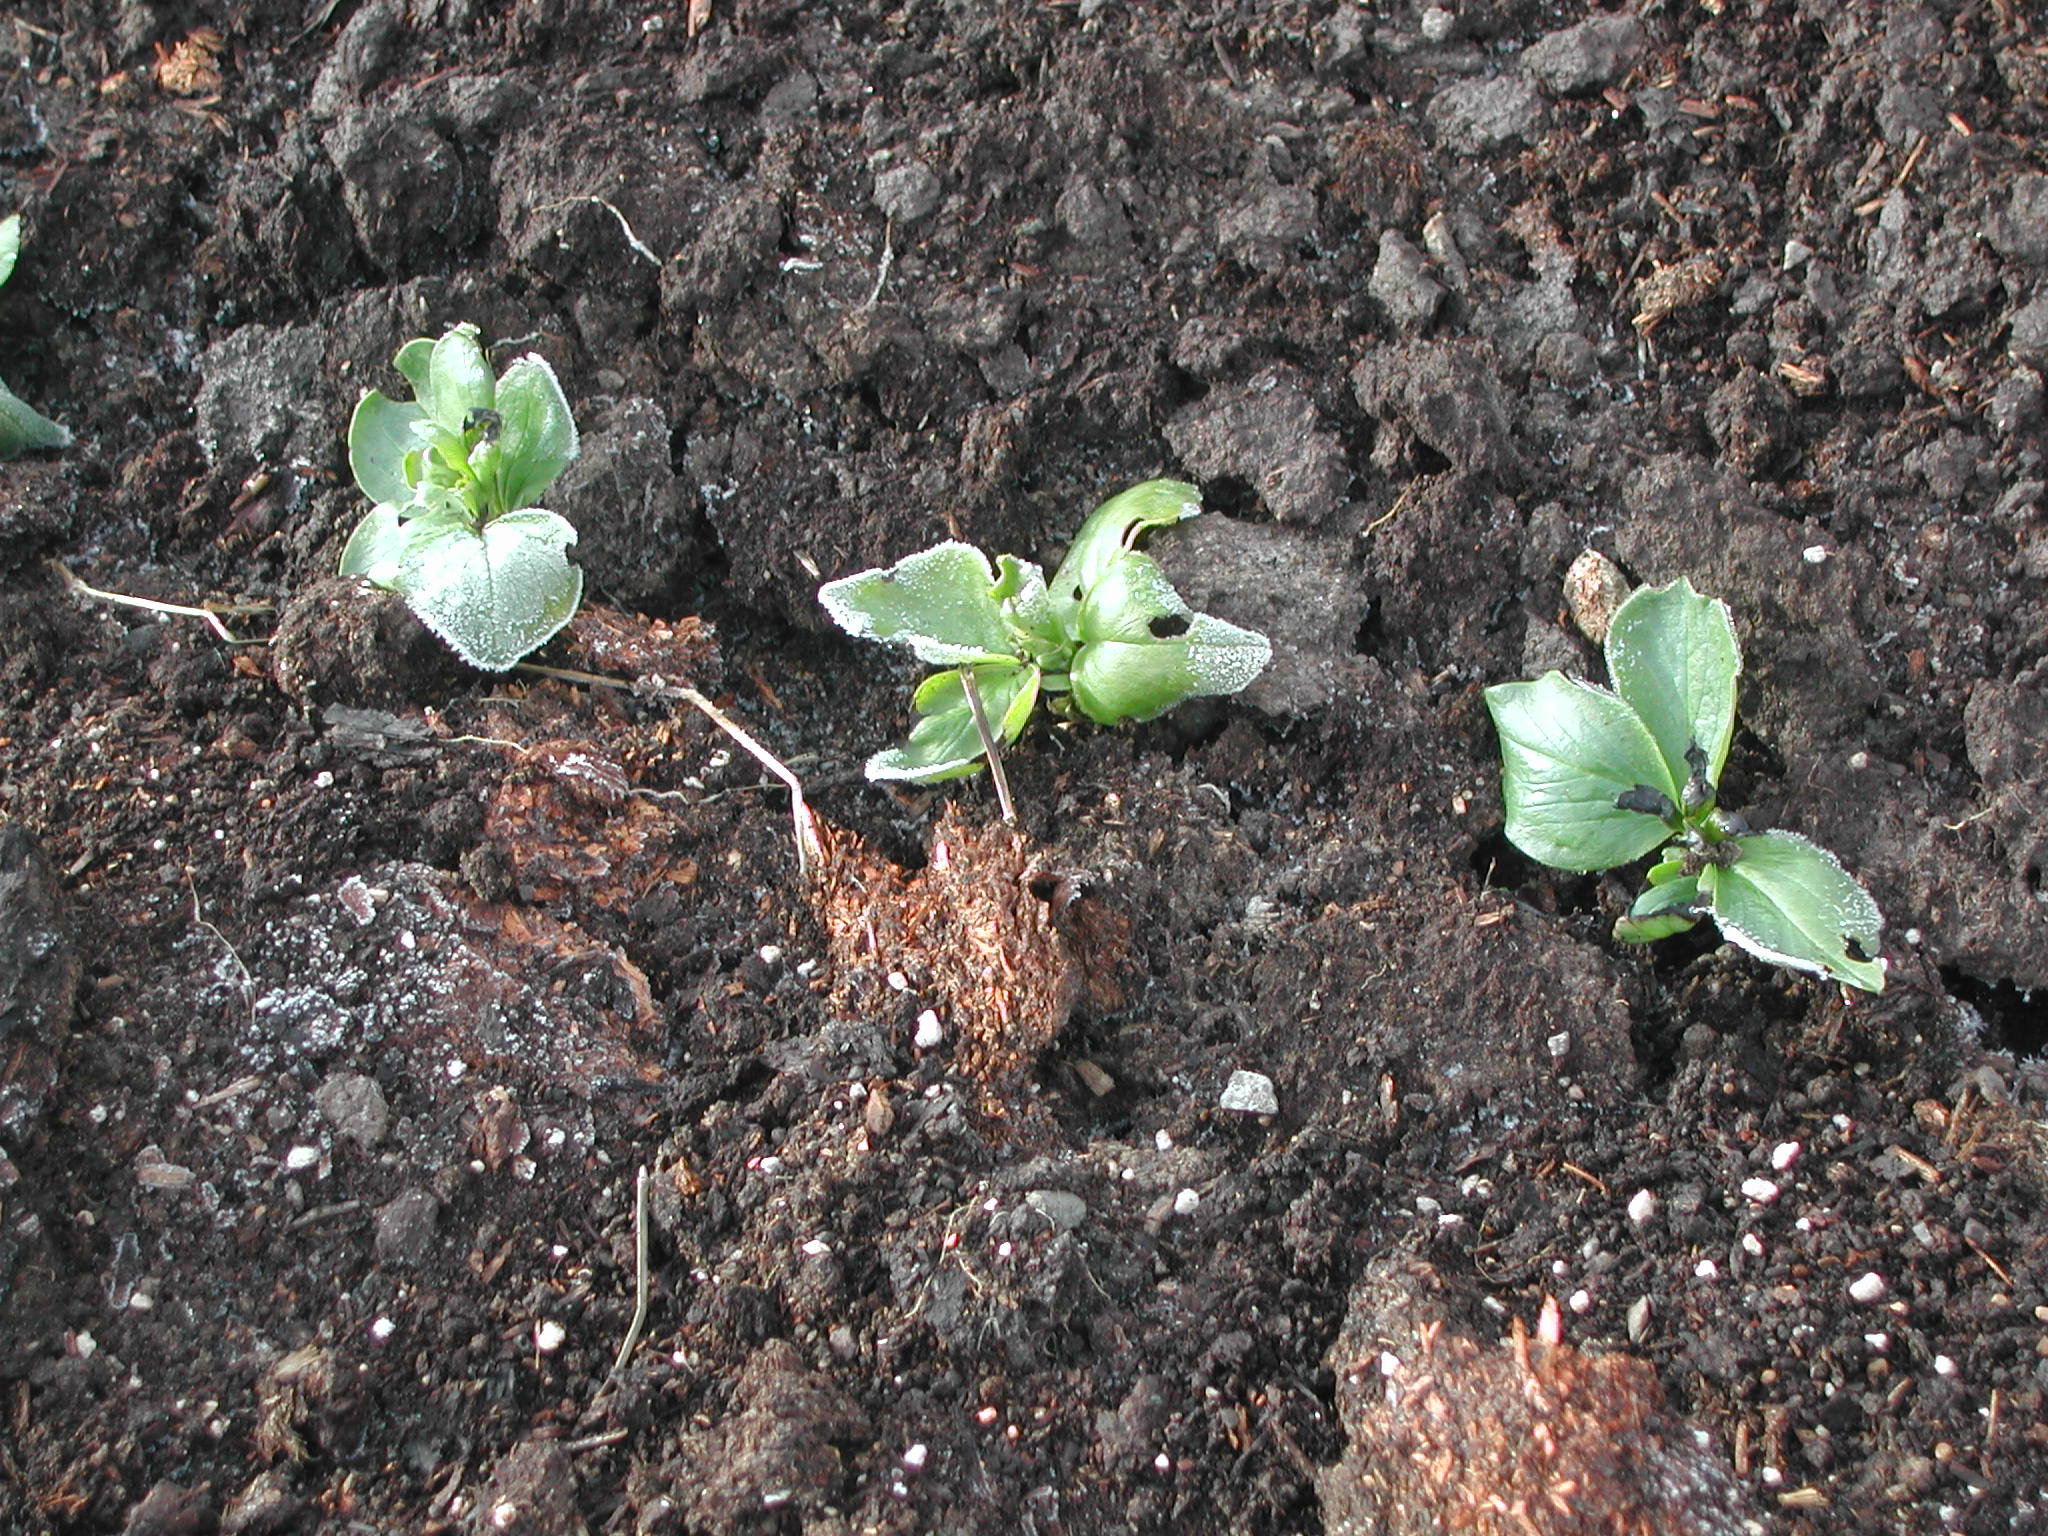
The fava beans are up and growing for next season
It is cold today. The low temperature this morning was 13.8 degrees, though not for long. We started getting ready for cold weather the week before Thanksgiving. Originally, I was planning to leave a bunch of crops out in the field all winter, but I decided to harvest several of them and move them into indoor storage. I knew I would have to turn off the irrigation water, so I did that, too, even though that meant some clean up would be put off until temperatures warmed up enough to turn it back on. I can wait.
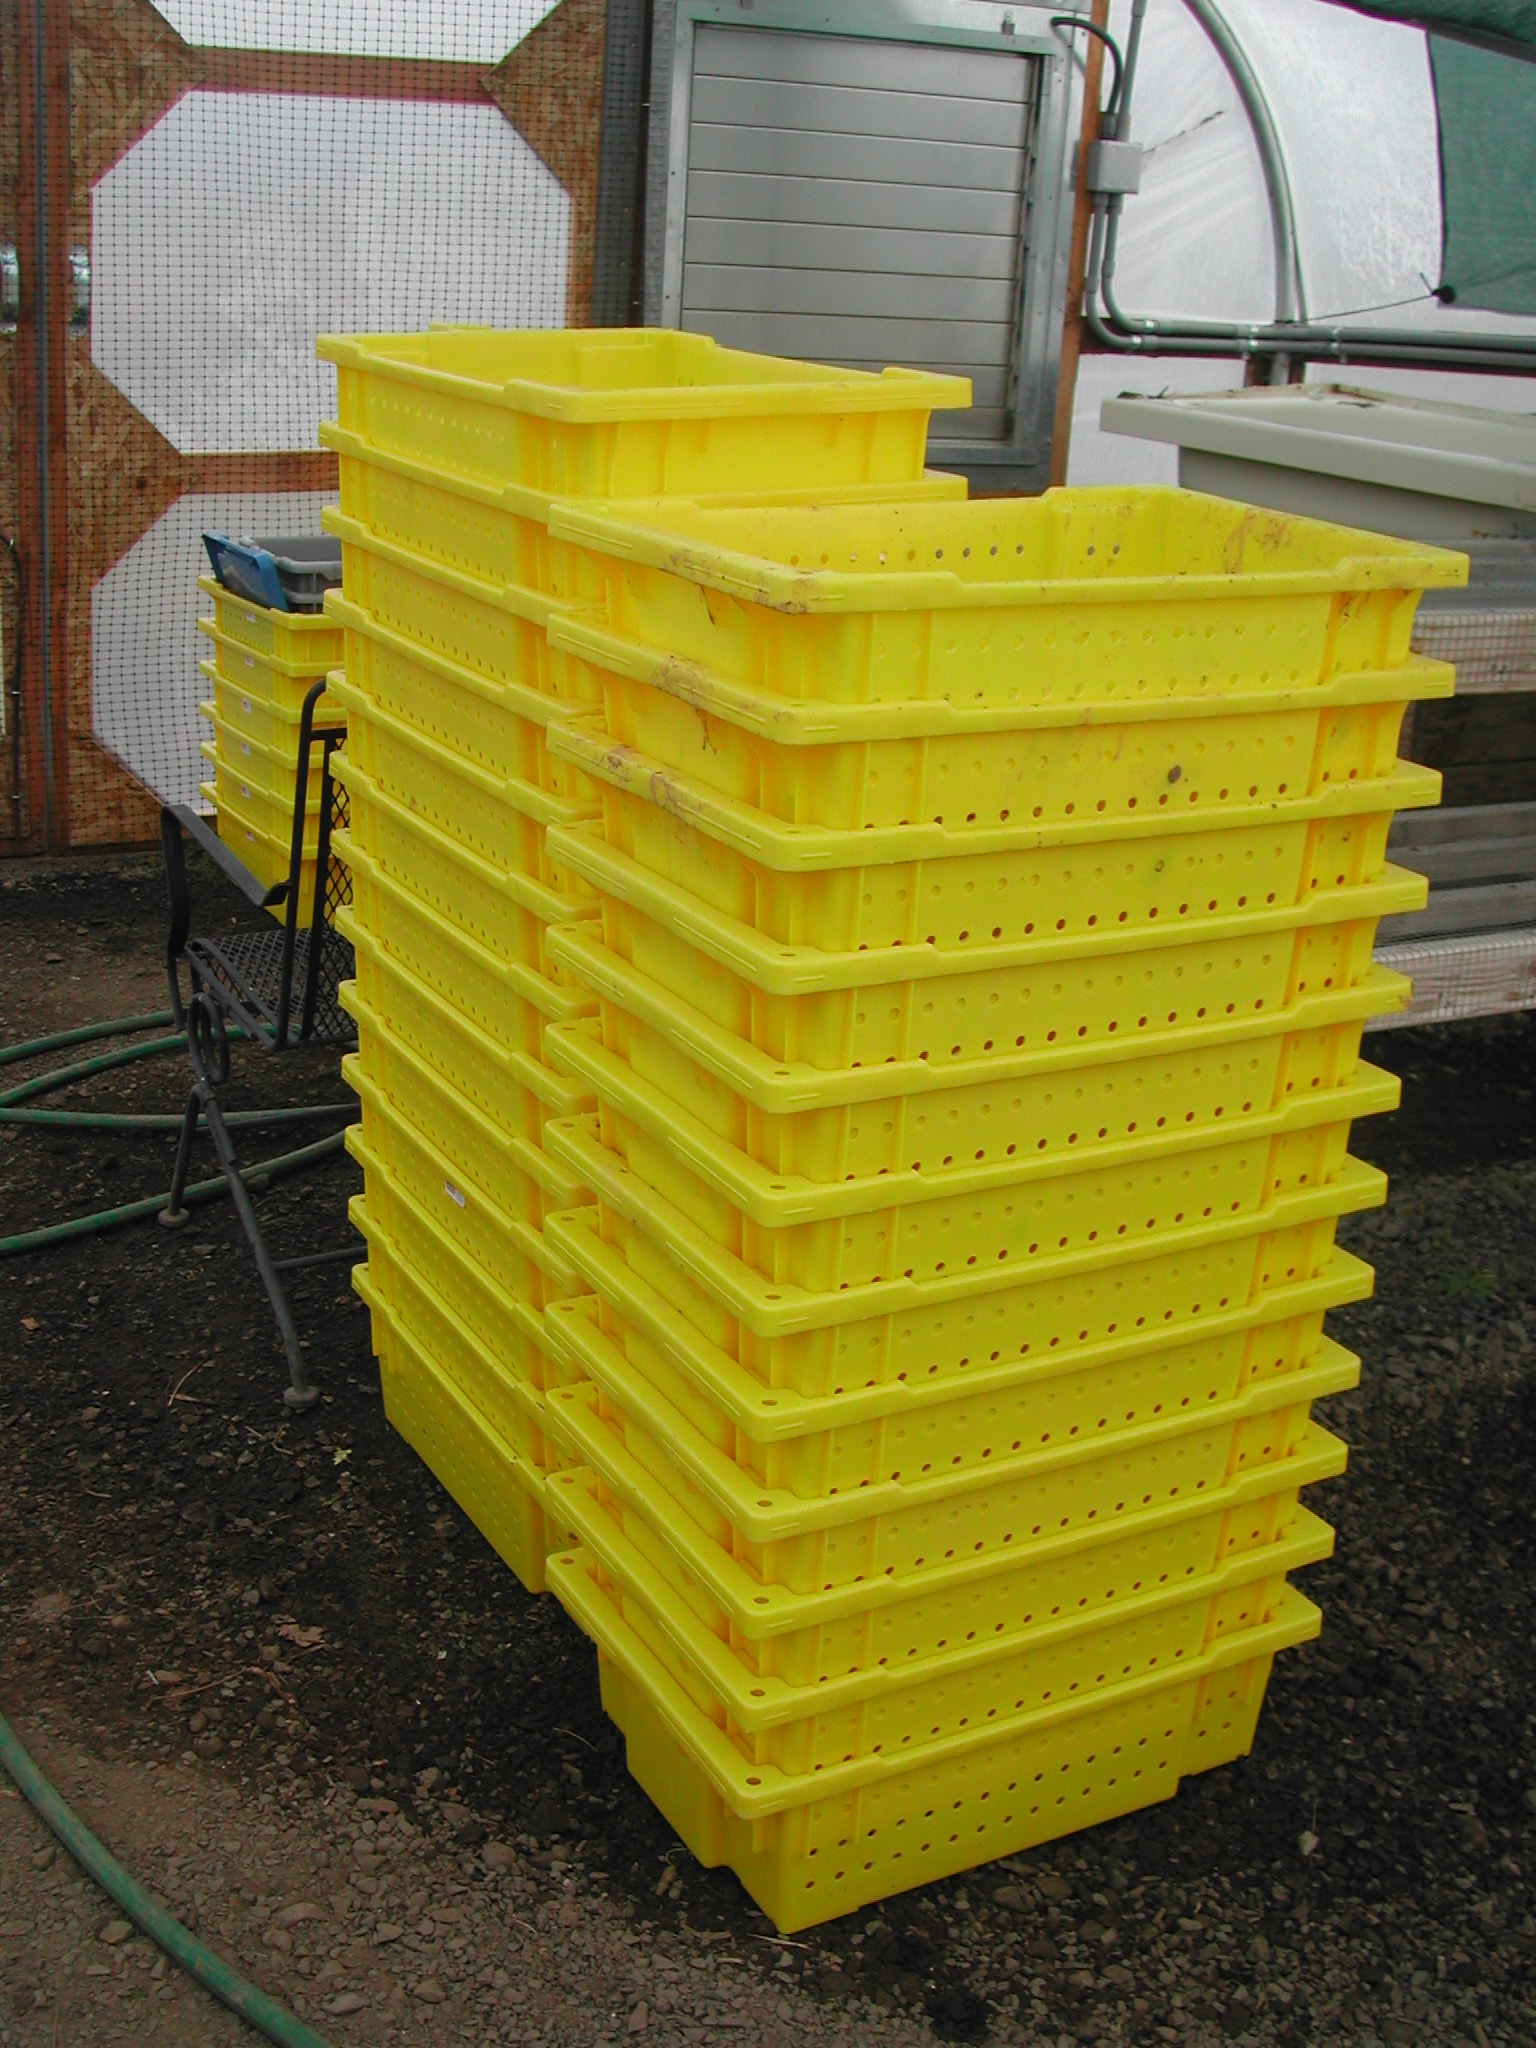
These bins will have to wait for warmer temperatures to be washed up and put away
We’ve gotten a little tougher with the girls down here than we were on Sauvie Island. On Sauvie Island, we turned on the heat lamp in the coop if the temperatures got into the 20’s. Now, they don’t even have a closed coop and we haven’t put out a lamp yet. We did put up a tarp over two open sides of the coop to keep out the wind. I am keeping a close eye on them.
Over Thanksgiving week, I spread some mulch over the garlic and fava beans for next season. The garlic was just barely coming up, so I covered it up again. The fava beans were already up, so I had to be more careful spreading it around them.
The kale will stay in the field all winter and in the spring, we can enjoy it again.
Now that I am ready for winter, I can stop and think more about how this past season went and plan for next year. It was a very good season on our new farm, the longest I have ever had. We had great weather this year, especially in the spring. Though our soil is sticky with clay and silt, it can grow good vegetables. Most of the crops did very well. I did find out what pests I’ll need to work on in the future and it will be a long term project to bring some populations to an acceptable level. (My gopher count got off a bit, but I think we are somewhere around 60 gophers trapped this year. My drowned slug and squished cucumber beetles numbers are much, much higher.) We are already planning to open up a new field or two for next year and I’ll keep trying to come up with more efficient ways to plant and weed and harvest.
Mostly, I think we made the right choice to buy this place and I think about you, my customers. You have made it possible for me to have the best job, growing vegetables. Good things to think about as we head into winter.

Hoop house temp today at about 11:30 am. Even on freezing, overcast days, the hoop house is a nice place to work
Brussels Sprouts

Igor Brussels sprouts
Yeah! I have Brussels sprouts this year! I have tried to grow them before, but I never got them in early enough for them to mature before I stopped delivering. This year, they made it. With the timing about right, next year I’ll experiment with the spacing, by putting them in their own bed with just one row and see what kind of a difference that makes. In the mean time, there are some sprouts to eat. Here are two ideas, one cooked and one raw:
Cooks Illustrated experimented with Brussels sprouts a few years ago, to find a really good way to roast them. Here is what they came up with:
Roasted Brussels Sprouts (serves 6 to 8)
- 2 1/4 pounds Brussels sprouts, trimmed and halved (or quartered, if large; whole, if small)
- 3 T olive oil
- 1 T water
- salt and pepper
Put the oven rack in the upper middle position and heat the oven to 500 degrees. Toss the Brussels sprouts with oil, water, 3/4 t salt and 1/4 t pepper, until coated. Transfer the sprouts to a rimmed baking sheet, with cut sides down.
Cover the sheet with aluminum foil and roast for 10 minutes. Remove the foil and continue roasting until the sprouts are well browned and tender, 10 to 12 minutes more. Season with salt and pepper.
Options:
1. While sprouts are roasting, heat 3 T olive oil in a skillet over medium heat. When shimmering, add 2 minced garlic cloves and 1/2 t red pepper flakes, cooking until garlic is golden and fragrant, about 1 minute. Remove from heat. After sprouts are done, toss with the garlic and pepper flake oil and season with salt and pepper. Sprinkle with 1/4 c Parmesan cheese before serving.
2. While sprouts are roasting, cook 4 slices of bacon until crisp. Transfer bacon to paper towel lined plate and reserve 1 T of bacon fat. Finely chop bacon. When sprouts are done, toss with 2 T olive oil, reserved bacon fat, chopped bacon and 1/2 cup finely chopped toasted pecans. Season with salt and pepper.
3. Toss roasted sprouts with 3 T melted unsalted butter, 1 T lemon juice and 1/3 cup finely chopped toasted walnuts. Season with salt and pepper.
Kale and Brussels Sprout Salad from Bon Appetit (serves 8 to 10)
- 1/4 c fresh lemon juice
- 2 T Dijon mustard
- 1 T minced shallot
- 1 small clove garlic, finely grated
- 1/4 t kosher salt, plus more for seasoning
- freshly ground black pepper
- 2 large bunches of Lacinato kale (about 1 1/2 pounds), center stems discarded, leaves thinly sliced
- 12 oz Brussels sprouts, trimmed, halved and thinly sliced
- 1/2 c extra-virgin olive oil, divided
- 1/2 c almonds with skins, coarsely chopped
- 1 c Parmesan, grated
Combine lemon juice, mustard, shallot, garlic, salt and a pinch of pepper in a small bowl. Stir to blend, then set aside to let flavors blend. Mix sliced kale and sprouts in a large bowl. From the 1/2 c of olive oil, take 1 T and heat in a small skillet over medium high heat. Add almonds and stir frequently until golden brown in spots, about 2 minutes. Drain on a paper towel lined plate. Sprinkle almonds with salt. Whisk remaining olive oil with lemon/mustard mixture. Season with salt and pepper as needed. Add to kale and sprouts, with cheese, tossing to coat. Garnish with almonds.
(You may notice, this is very much like the kale salad I love so much. The recipe for that salad is here, along with a link to a Kale Waldorf salad, that you could easily add Brussels sprouts to as well.)
Beans (And More Recipes)

Black Turtle Beans
Last week, we began shelling our dry beans. We started with the Black Turtle Beans, an heirloom bean from southern Mexico and Central America. They have been grown for over 7000 years! I have used these in soups, chili, salads, and dips/purees. They have a great flavor and hold their shape well. This week, we’ll work on the Rockwell beans. These are a rare heirloom bean, named after Elisha Rockwell, a pioneer who brought it to Whidbey Island, Washington, in the late 1800s. They have been grown there by home gardeners ever since and have just entered the larger marketplace the last few years. I have used these in the same ways I use the black beans, but I like them best in soups, chili and purees. I don’t usually make baked beans, but on Whidbey Island, that is how they are most loved. I love the flavor of these beans, but for me, they haven’t held their shape as well as the black beans.

Rockwell dry beans-sorry this is the same picture as a few weeks ago.
In case you haven’t cooked with dry beans before, they need to be soaked before cooking. I’ll give a few methods, one for when you are thinking ahead and one for when you are not quite so much (but still a little bit). Both of these methods are adapted from More-with-Less Cookbook by Doris Janzen Longacre.
Overnight Soaking Method
Rinse the beans (they might need a little rubbing as well) and place in a large pot, with 4 cups of water for every cup of beans. Cover and let stand 6-8 hours or overnight. Drain and rinse the beans.
Quick Soaking Method
Follow the directions for the overnight method, but instead of soaking, bring the water and beans to a boil for 2 minutes. Turn off the heat, cover and let stand 1 hour. Drain and rinse the beans.
After soaking, to cook the beans, follow the recipe directions or, you can place them back in the pot and cover with cold water by a few inches. If the beans are tender (and they should be after soaking), add a big pinch of salt. Bring the water to a boil, and then lower to a simmer. Let them cook until they are tender, stirring occasionally. If you like, you can add whole, peeled garlic cloves, a bay leaf and a chunk of peeled onions, for some additional flavor. These beans won’t take long to cook, maybe 5 to 15 minutes. I say maybe 5, because when I use the Quick Soaking Method, I usually end up letting them soak for more than 1 hour, and by the time I am ready to cook them, they are so close to being done, that if I am making a soup or something like that, I let them finish up in the dish.
Now for some recipes. I have two soup recipes, a dip, and a bean side dish. And don’t forget the recipe from a few weeks ago, The Squash and Kale with White Bean Stew.
Black Bean Pumpkin Soup adapted from Gourmet, November 1996
- 4-5 cups cooked black beans, drained and rinsed
- 1 cup canned tomatoes, drained and chopped
- 1 1/4 cup chopped onion
- 1/2 cup minced shallot
- 4 cloves garlic, minced
- 1 T plus 2 t ground cumin
- 1/4 cup butter
- 4 cups stock (I used vegetable, since that was what I had)
- 1 1/2 to 2 cups pumpkin or winter squash puree (I chose to dice the squash into 1/4 inch cubes)
- 1/2 cup dry sherry
- 1/2 pound cooked ham, cut into 1/8 inch dice
- 3 to 4 T Sherry vinegar
Coarsely puree the beans and tomatoes in a food processor. (I skipped this step and made a chunky soup instead of a pureed one.)
In a 6 quart pot, cook the onion, shallot, garlic, cumin, salt and pepper in the butter, over moderate heat, stirring until the onion is soft and beginning to brown. Stir in the bean puree, stock, pumpkin and sherry. Simmer, stirring occasionally, for 20-30 minutes, or until the squash is tender. (Or, if you are using the purees, until it is as thick as you like.)
Add the ham and vinegar and simmer until heated through. Season with salt and pepper. Garnish with sour cream, cilantro and/or toasted pumpkin seeds.
Black Bean Dip adapted from Simply in Season
- 1 T sesame seeds (toasted and ground–I left these out, since I didn’t have any on hand)
- 1 T olive oil
- 1 onion (chopped)
- 2 cups cooked black beans
- 2-4 T fresh cilantro (chopped)
- juice of 1 lime (about 1/4 cup)
- 1-2 cloves of garlic, minced
- salt, hot pepper sauce, and ground cumin to taste
Heat the olive oil in a frying pan and saute the onions until tender. Add the black beans and heat through. Place 1/2 cup of the bean mixture in a bowl with the sesame seeds. Puree the remaining beans in a food processor. Mix pureed beans with the beans and sesame seeds. Add the remaining ingredients and stir well. Serve warm or cold as a dip or a filling for tacos, burritos, or quesadillas.
White Beans with Rosemary and Garlic adapted from The Art of Simple Food
1 cup dried Rockwell beans, cooked (about 3 cups–see the cooking directions above)
1/4 cup olive oil
4 cloves garlic, coarsely chopped
1 t coarsely chopped fresh rosemary
In a heavy saucepan or skilled, warm the olive oil over low heat. Add the garlic and rosemary and cook until the garlic is soft, about 2 minutes. Stir in the beans, and add salt, if needed. Let the dish sit for a few minutes to allow the flavors to blend.
You could also let the beans cook further and mash them to make a puree.
Celeriac Soup adapted from River Cottage
Not a bean recipe, but a friend/customer told me her husband made a really good celeriac soup. I decided to look for a recipe and try it out. This may not be the same recipe, but we liked it.
- 1/4 cup butter
- 1 celeriac, peeled and cubed
- 1 potato, peeled and cubed
- 1 leek, trimmed, washed and roughly sliced
- 1 onion, peeled and roughly chopped
- 1 garlic clove, sliced
- 1 quart stock, chicken or vegetable
- 1 hot pepper (whole–I added this )
Melt the butter in a large pot over medium low heat. Add the celeriac, potato, leek, onion, garlic and hot pepper and season with salt and pepper. Cook the vegetables gently for about 10 minutes, until they start to soften. Add the stock, bring the soup to a boil, then turn down and simmer for about 20 minutes, until the celeriac is tender. Remove the hot pepper and puree until smooth (I did not). Reheat and serve.
I saw another celeriac soup recipe I had saved from The Oregonian back in 2008. It was basically the same, but instead of potato, it used a Granny Smith apple and instead of the garlic and hot pepper, a bay leaf, black peppercorns and thyme (all removed before pureeing). It also added 1/2 cup heavy cream and nutmeg after pureeing, just before serving.
Persimmons
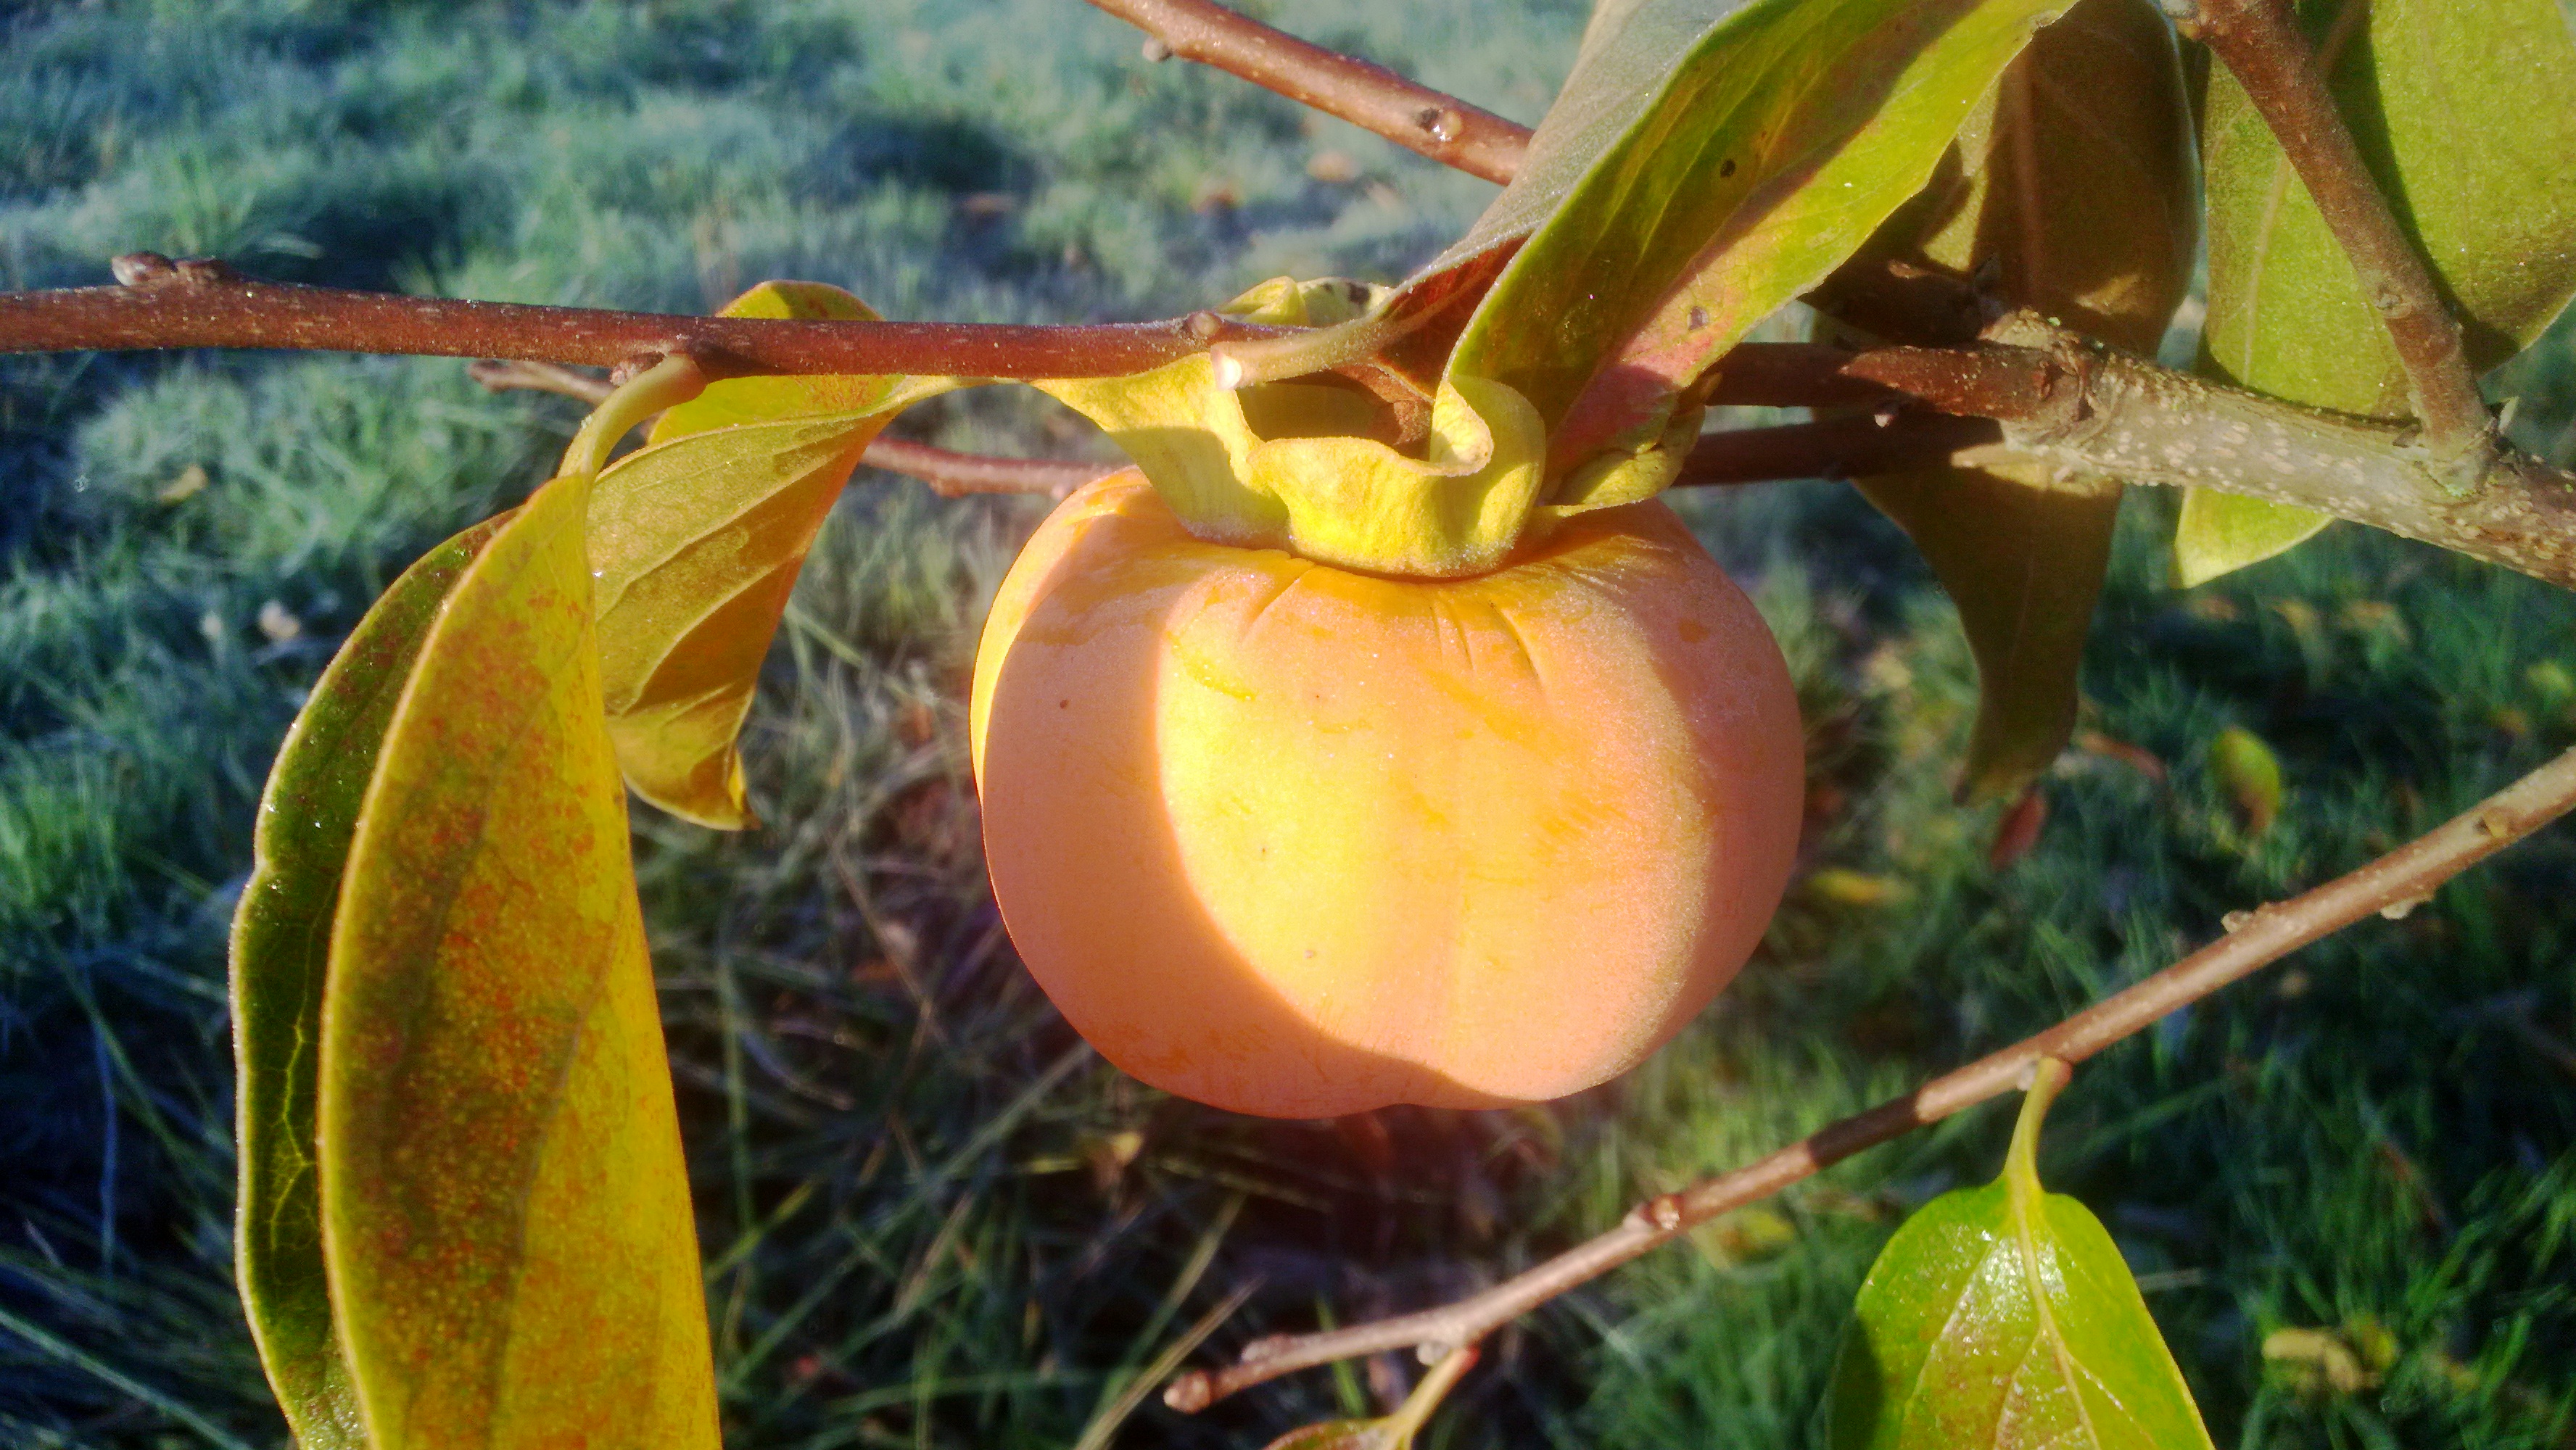
A slightly frosty persimmon
The start of November marks the movement into what I consider the winter season, though it is still really fall. Last weekend and this past week, we got the last of the planting done: cover crop, fava beans and garlic are all in. The first annual rye grass seed that we planted for cover crop is germinating (we planted over two weekends). Hopefully the vetch and the second round won’t be far behind. Since we had some rain this weekend, it should speed things up a bit. Once I mulch the fava beans and garlic, the field work will be done for the season, except for a little more harvesting.

A very frosty Famosa cabbage
Last Monday and Tuesday nights, we had two good, hard frosts. The temperatures were down to 29 degrees by our house, but I think it got colder out in the fields. The only sensitive thing we covered with row cover out in the fields was the celery. The cucumbers and peppers were in the hoop house, though it even got cold enough in there to do in the cucumbers. They were done producing anyway, so that was okay. It was a good run with the hoop house cucumbers. I don’t think I’ve ever had them last through the end of October before. The peppers are still doing fine.
Now for the persimmons. Just before the frost, I realized the persimmons were ready to start picking. Last winter, when we moved here, there were still persimmons on the trees. They were the first I’d ever eaten. Since I hadn’t eaten them before, let alone grown them, I had (and still have) some learning to do. What I have learned, is that are two categories of persimmons: astringent and nonastringent. The variety we have, Ichi Ki Kei Jiro (or Early Jiro), is nonastringent. For the nonastringent category, once they have colored, they are ready to start eating. At this stage, they are still firm and crisp in texture, and the flavor is sweet and mild. If they are allowed to soften up a bit, the flavor increases. You can wait until they are really soft, almost jelly-like, for the fullest flavor. I will need to do some experimenting with what happens when you leave them at room temperature versus in the refrigerator. From what I have read, they may not keep long at room temperature, though I don’t know how long “not long” is. If anyone out there is more familiar with persimmons, I’d be happy to have you share what you know.

There isn’t much fruit on this persimmon tree, but the leaves have some beautiful fall colors
Pumpkin (or Winter Squash) Recipes, Part 2

Galeux d’Eysines winter squash
I like pumpkins and winter squash, and since I grow a lot of them, we eat a lot of them. Steven does eventually get tired of them, but I haven’t yet. This year, we have more than ever, so, who knows, I may reach my limit. I have collected and tried many different recipes and the following are my favorites, except for one; it is not one of my favorites, because I haven’t tried it yet. It does sound really good…
Spicy Coconut Pumpkin adapted from Farmer John’s Cookbook
- 3 T butter
- 1 T vegetable oil
- 1 large onion, thinly sliced (about 2 c)
- 1 T minced fresh ginger
- 2-3 t curry powder
- 1 t finely chopped jalapeno or other hot pepper
- 1/2 t ground cloves
- 1/2 t ground cardamom
- 1 1/2 pounds pie pumpkin, peeled, seeded, cut into 1 inch pieces
- 1 1/2 c coconut milk
- 1 T raisins
- 1 t maple syrup or brown sugar
- salt and pepper
Heat the butter and oil in a heavy pan over medium heat. Add the onion and saute until light brown, about 20 minutes. Add the ginger and cook for a few more minutes. Stir in the curry powder, jalapeno, cloves and cardamom and cook for a few more minutes, stirring constantly. Add the cubed pumpkin, coconut milk, raisins and maple syrup. Cover and cook over low heat until the pumpkin is tender, about 30 minutes. Uncover and cook until the mixture is thickened to your taste. Season with salt and pepper.
Rockwell dry beans
Squash and Kale with White Bean Stew adapted from Farmer John’s Cookbook
- 1 lb dry white beans, ready to cook (soaked overnight and drained)–I hope to get my dry beans ready to sell soon. The Rockwell beans work perfect in this recipe.
- 1/4 olive oil, divided
- 1 whole head of garlic (stem and roots removed)
- 1 bay leaf
- 1 large onion, diced (about 1 cup)
- 4 cloves garlic, thinly sliced
- 1 T minced fresh sage
- 1 t cumin
- one hot pepper
- 3-4 lbs of winter squash, peeled, seeded and cut into 2 inch cubes
- 3 c vegetable or chicken stock or water (more, if needed)
- 1 pound kale, stems removed and chopped coarsely
- salt and pepper
Place beans in a large soup pot and cover by 2 inches of water. Add 2 T olive oil, the head of garlic and the bay leaf. Bring to a boil, partially cover and reduce to a simmer, cooking until the beans are tender. (Cooking times will vary, anywhere from several hours to 5-10 minutes for my Rockwell beans.) Drain, rinse, and drain again. Remove the garlic head. Heat the remaining 2 T of oil in another large pot, add the onions and saute until translucent, about 5 minutes. Stir in the sliced garlic, sage, cumin, and pepper; saute for a minute or so. Add the squash and stir. Add the stock or water, making sure it covers the squash (add more, if needed). Bring to a simmer and add the kale. Cook until the squash and kale are tender, about 20 minutes. Season with salt and pepper. Stir in the beans and simmer until heated through.
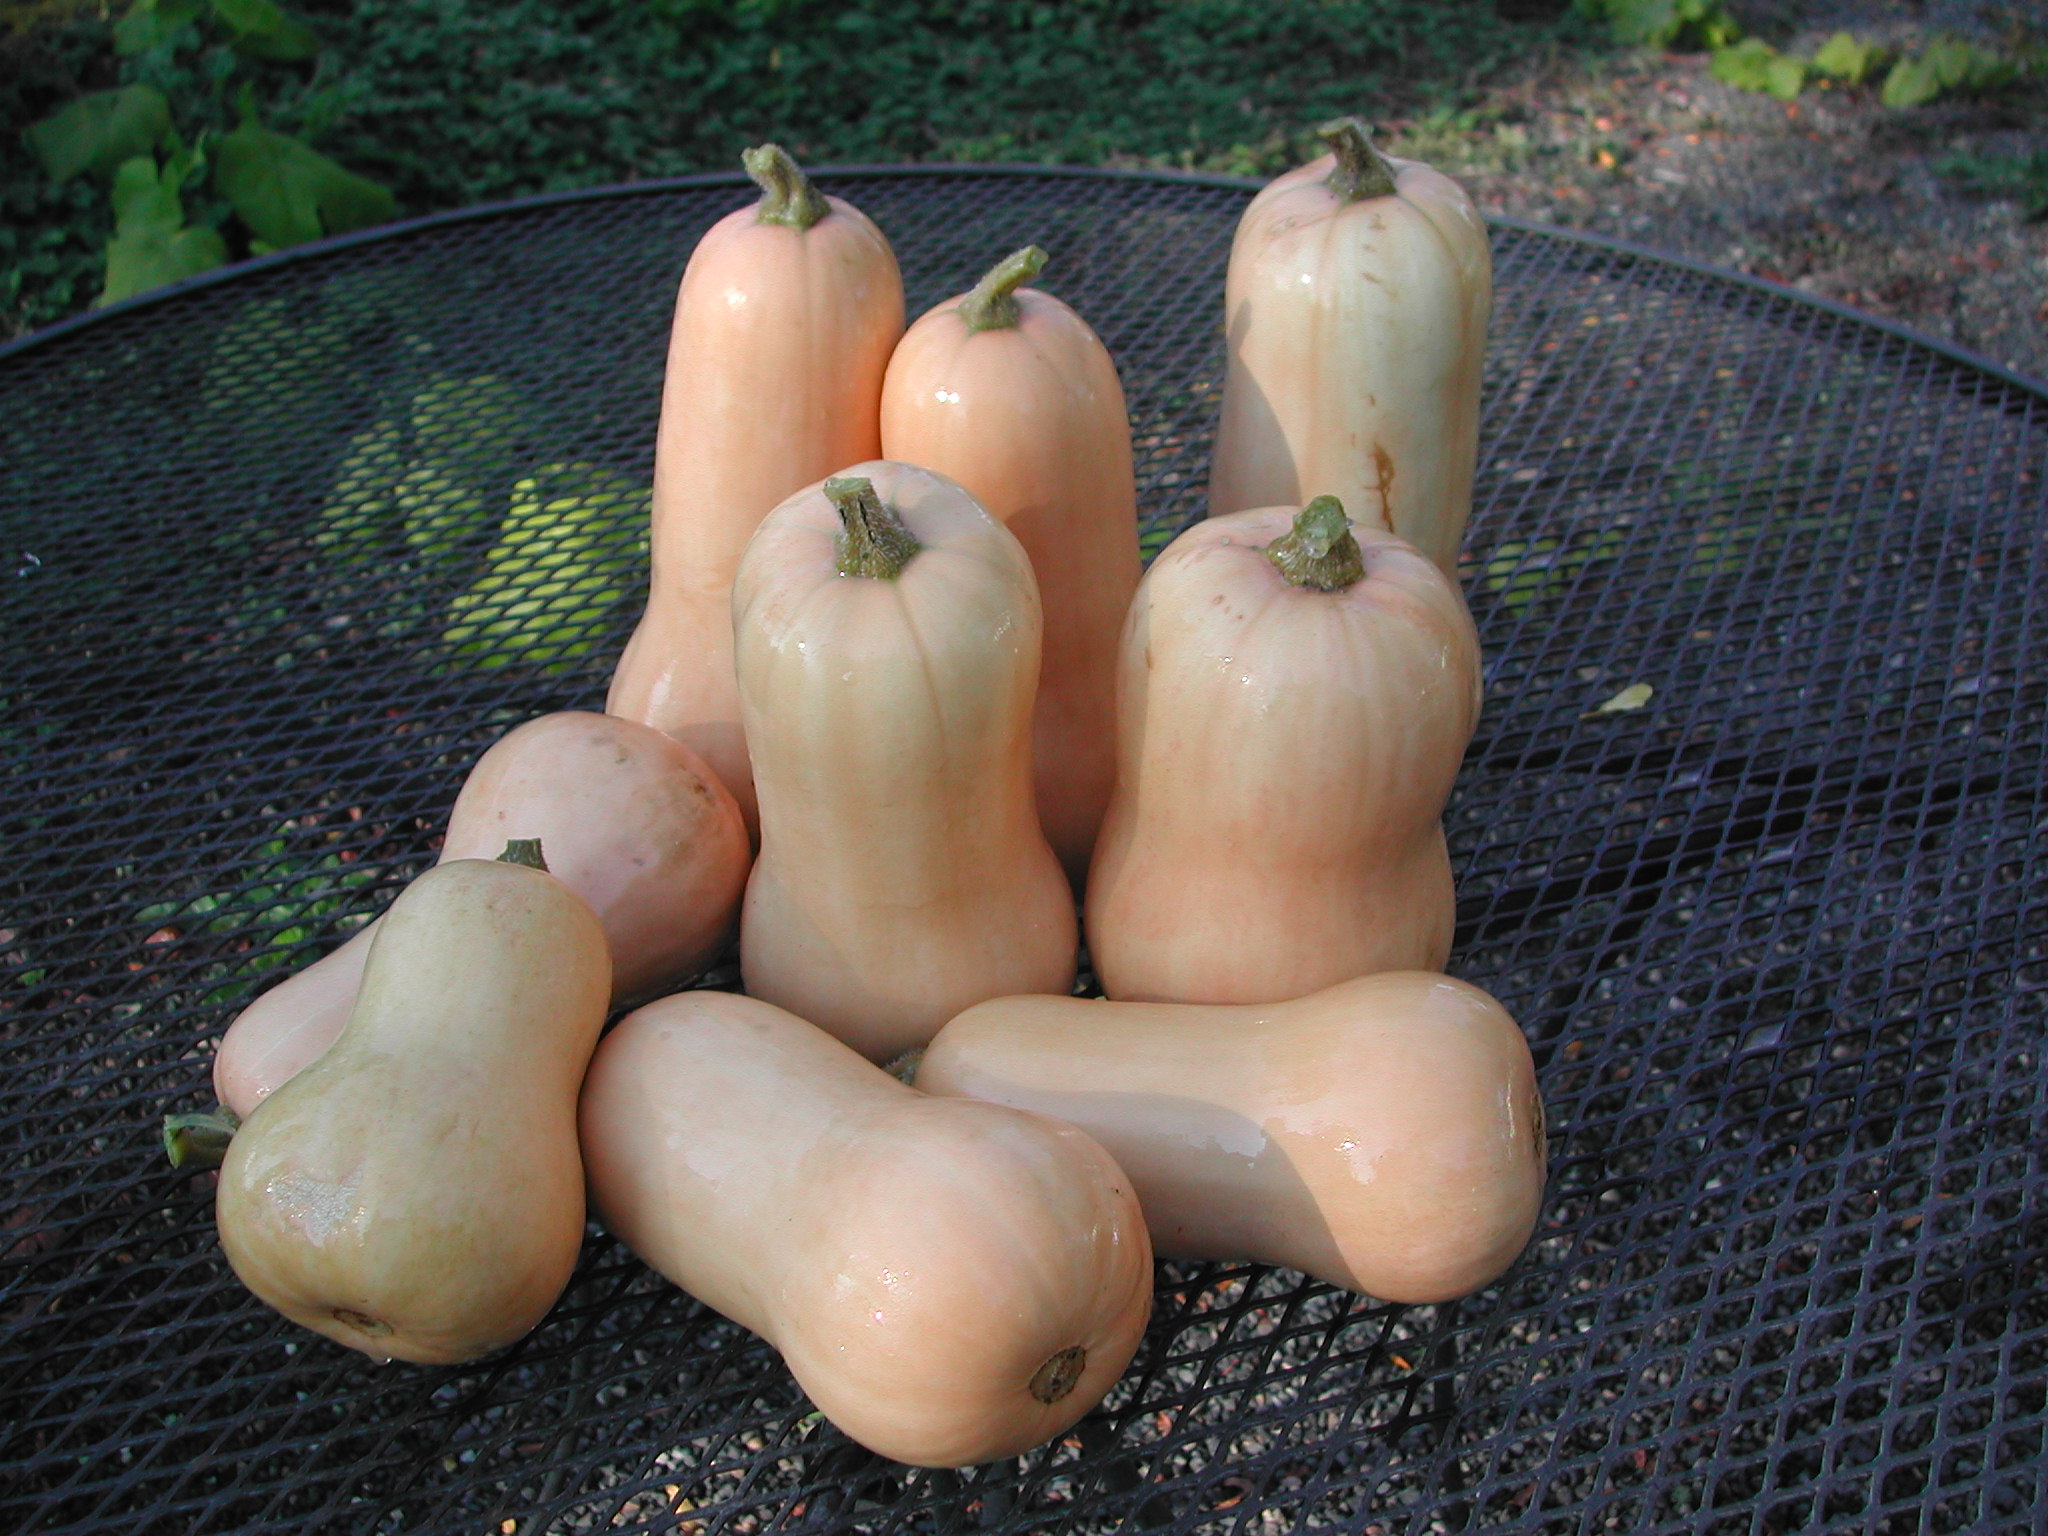
Waltham Butternut–hopefully, they’ll be on the list soon
Sweet Vegetables adapted from Extending the Table
- 3 c pumpkin or winter squash, peeled, seeded and cubed
- 2 c coconut milk
- 3 cloves garlic, minced
- 1/4 c onion, sliced
- 1 t ginger root, minced
- 1/2 t ground turmeric
- 2 t salt
- 2 sweet red peppers, thinly sliced
- 1 red jalapeno or other hot pepper, thinly sliced (optional)
Combine all the ingredients in a saucepan and bring to a boil, then simmer until the squash is tender.
I like to eat this over rice or other cooked grains, like farro or wheat berries.
Winter Luxury pumpkins
Winter Squash Bars adapted from Simply in Season
- 2 c winter squash or pumpkin (cooked and pureed)
- 1 1/2 c sugar
- 3/4 c oil (or replace part of the oil with applesauce)
- 4 eggs
- 1 t vanilla
- 1/2 t salt
- 1 c flour
- 1 c whole wheat flour
- 2 t baking powder
- 1 t baking soda
- 1 t cinnamon (can also add 1/4 t each of cloves, allspice, nutmeg and ginger)
Beat together the squash, sugar, oil, eggs, vanilla and salt in a mixing bowl. Mix in the flours, baking powder, baking soda and spices. Pour into a lightly greased 11 x 17 jelly roll pan. Bake at 350 degrees for 25-30 minutes.
I like to frost it with a cream cheese frosting.
I have many more recipes, but I need to stop…and tell you, we are up to 48 gophers now. I think I am getting better all the time at picking where to put the traps. Anyone up for a gopher skin hat?
Pumpkin (or Winter Squash) Recipes
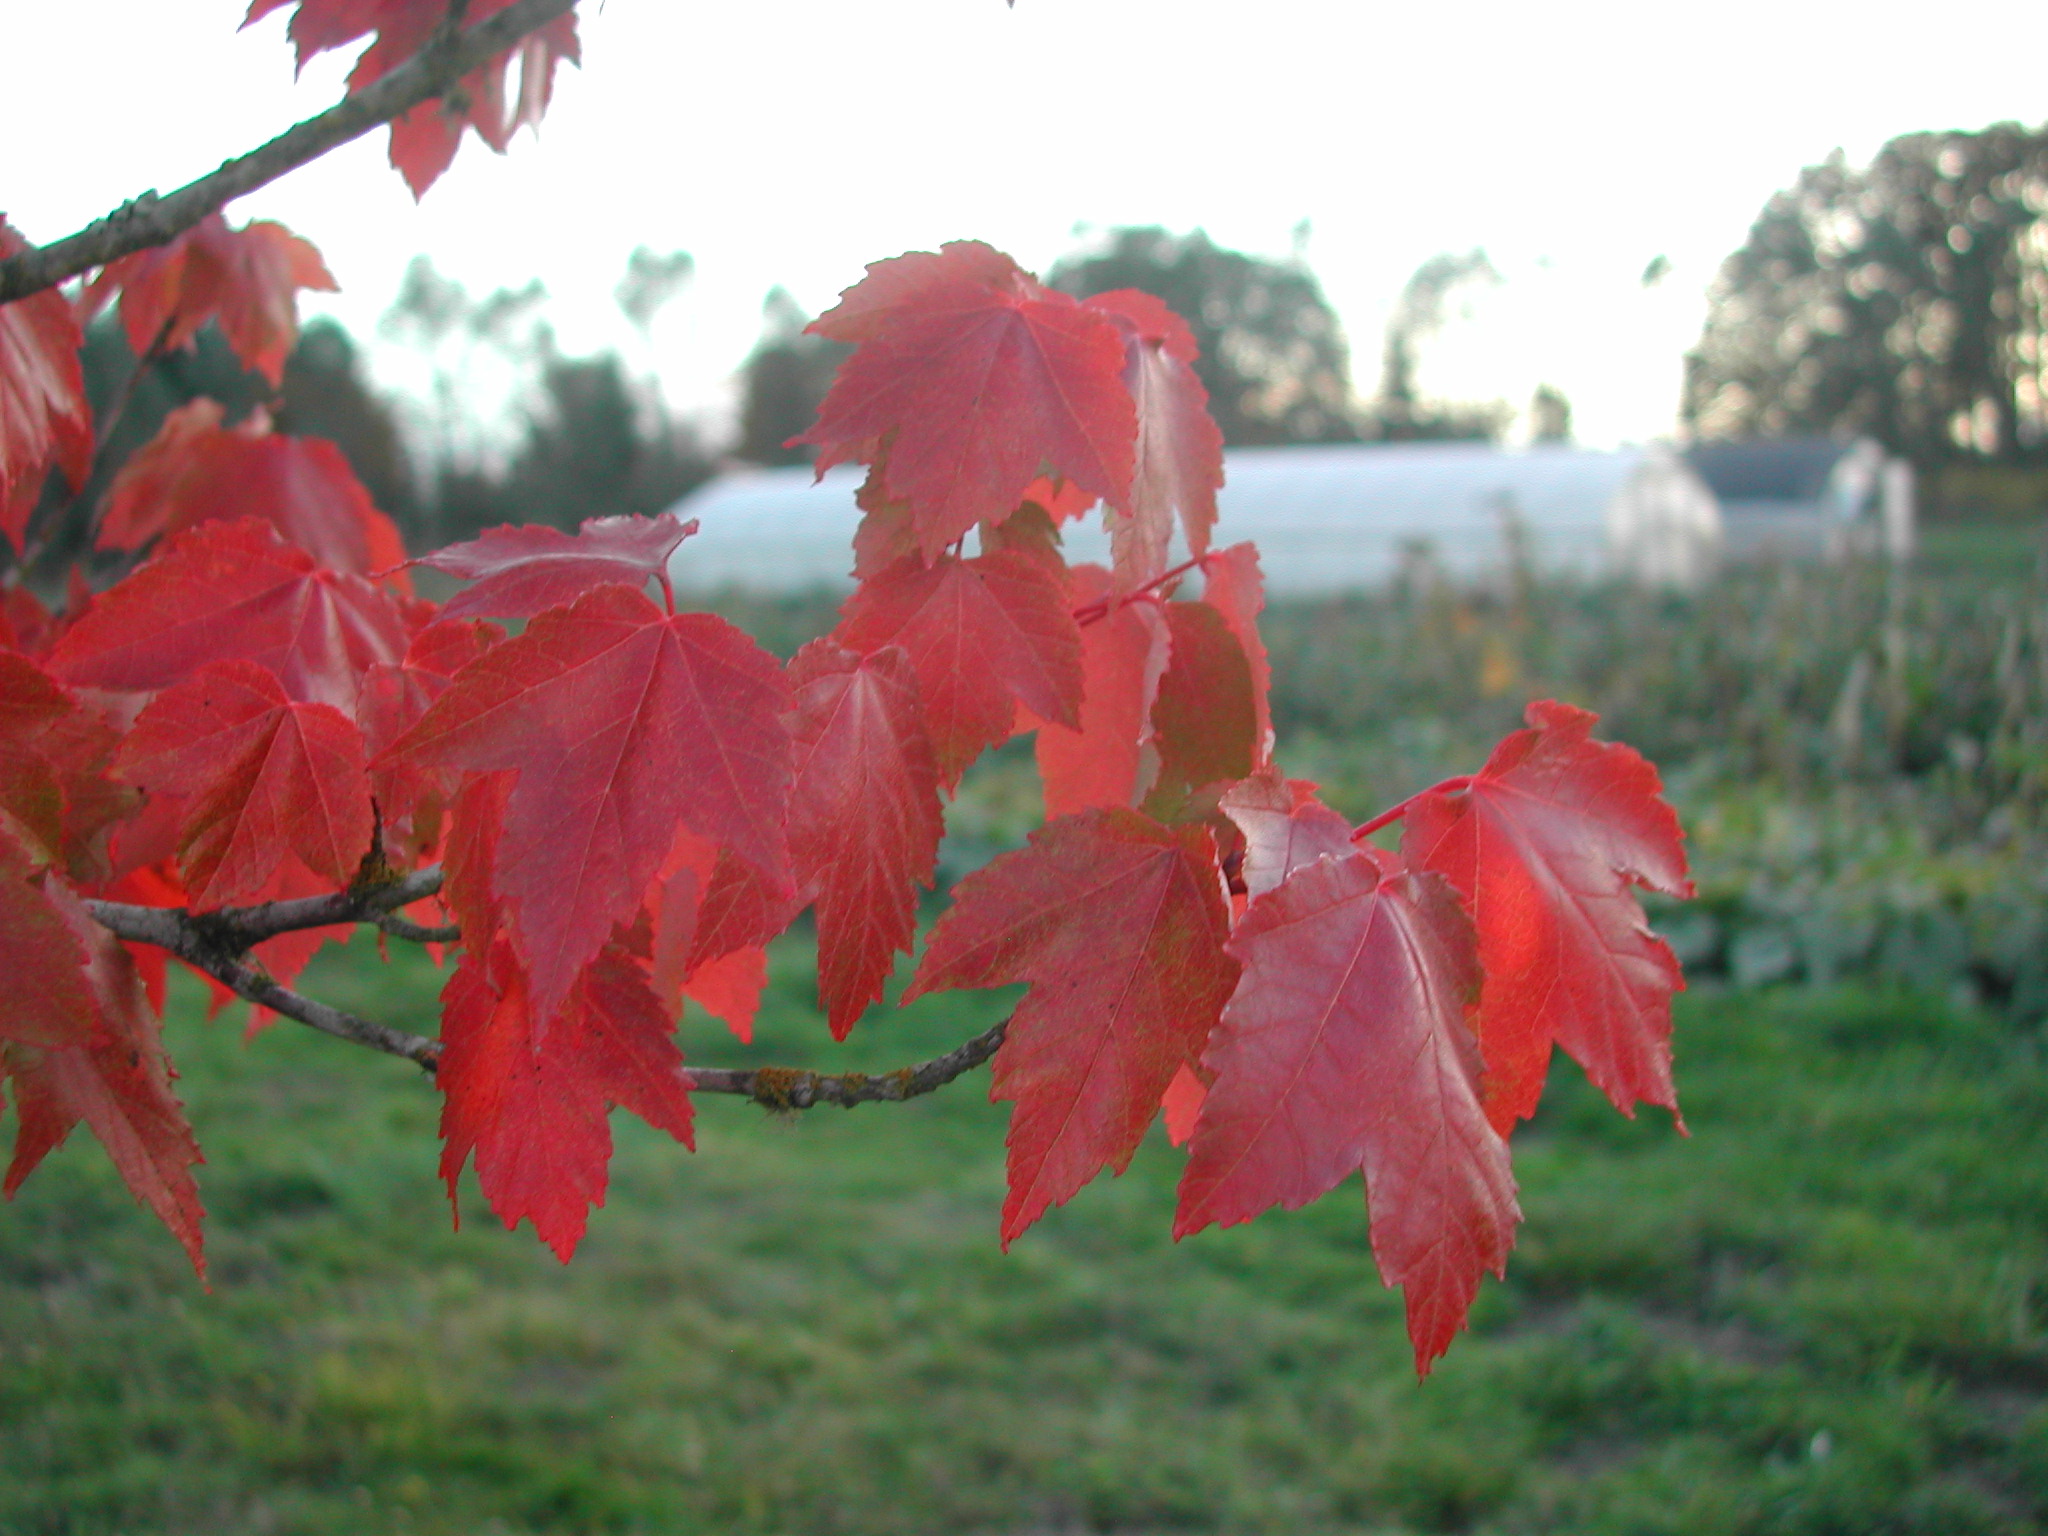
Beautiful fall color on the edge of the field
Before I get to the recipes, let me give a quick farm update. I have been so happy to have such nice weather the last two weekends. The rain from a few weeks ago made me think our chance to put in cover crop was over, but the soil is drying out and I hope to get the fields prepped this week (tilled with the tractor) and the cover crop seed sown on a good seed bed. I will also try to get beds ready to plant garlic and fava beans. For this, we pulled out all the tomato plants in one field, since I didn’t want too much plant debris in the way. It felt odd to pull them out when they were still looking good, though not producing much of anything. Usually, by the time I pull them out, they are dead. Not this year.
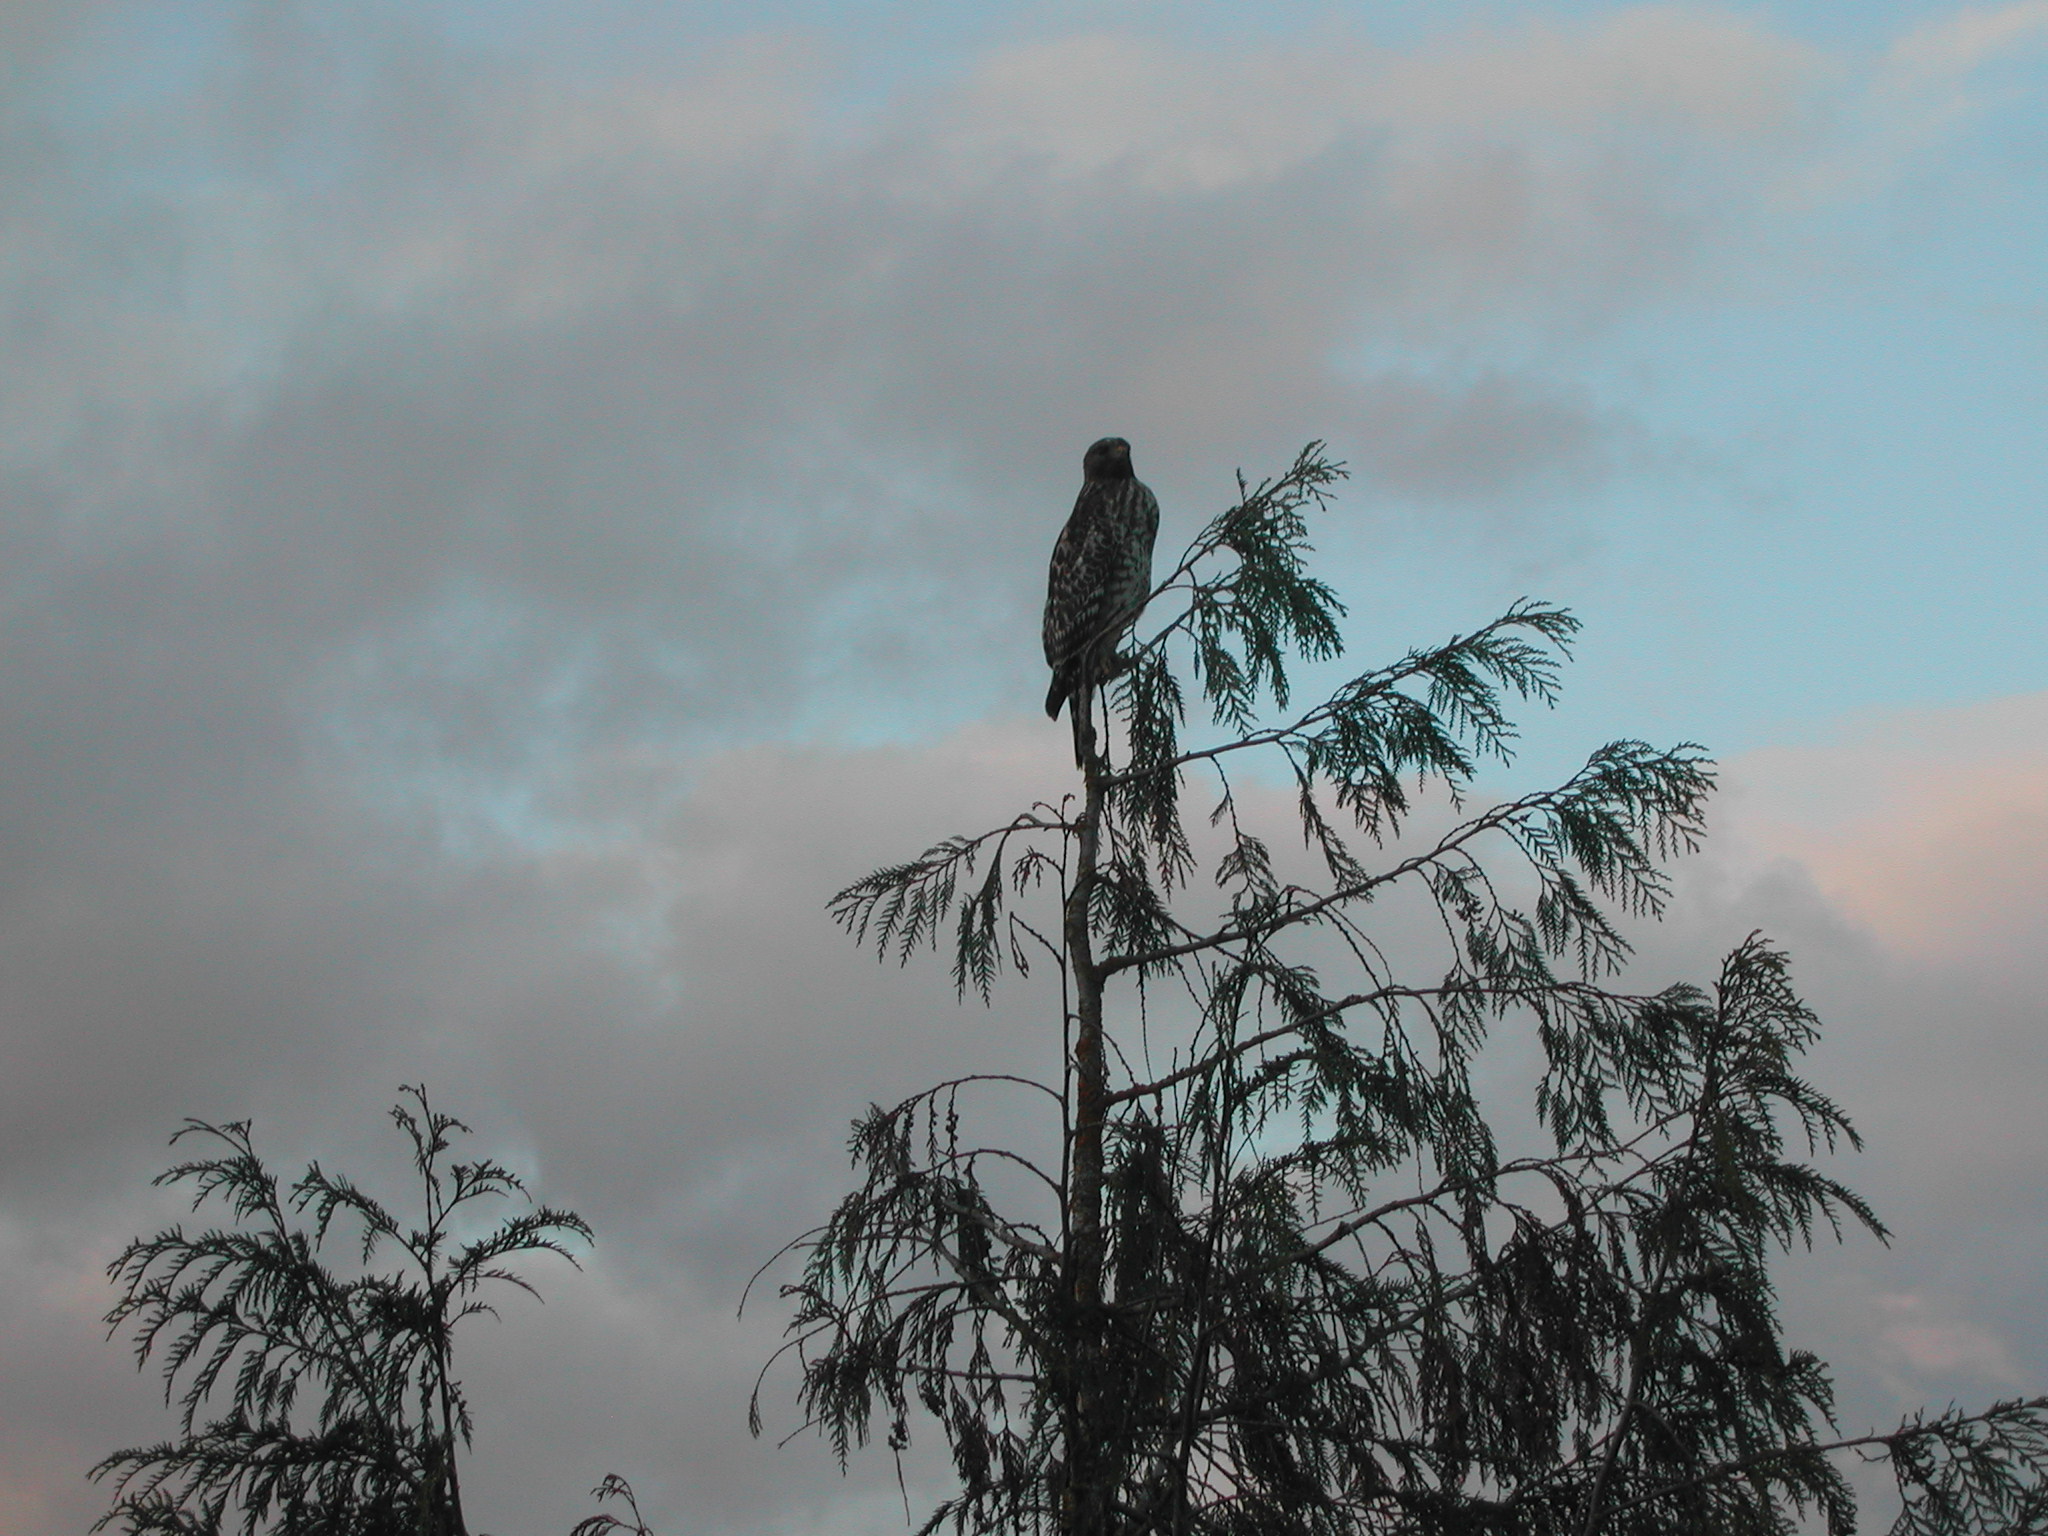
I’ve seed this guy hanging around the farm quite a bit lately
We are still working on the gophers, and catching more each week in the traps. We caught number 38 today. It was a big one, and it was a slow death. It dragged itself out of the tunnel, while still in the trap, trying to get away. Steven had to finish it off. I still can’t do it. I suppose I will eventually harden up to the realities of animal death on farms, but I think it will be a slow process.
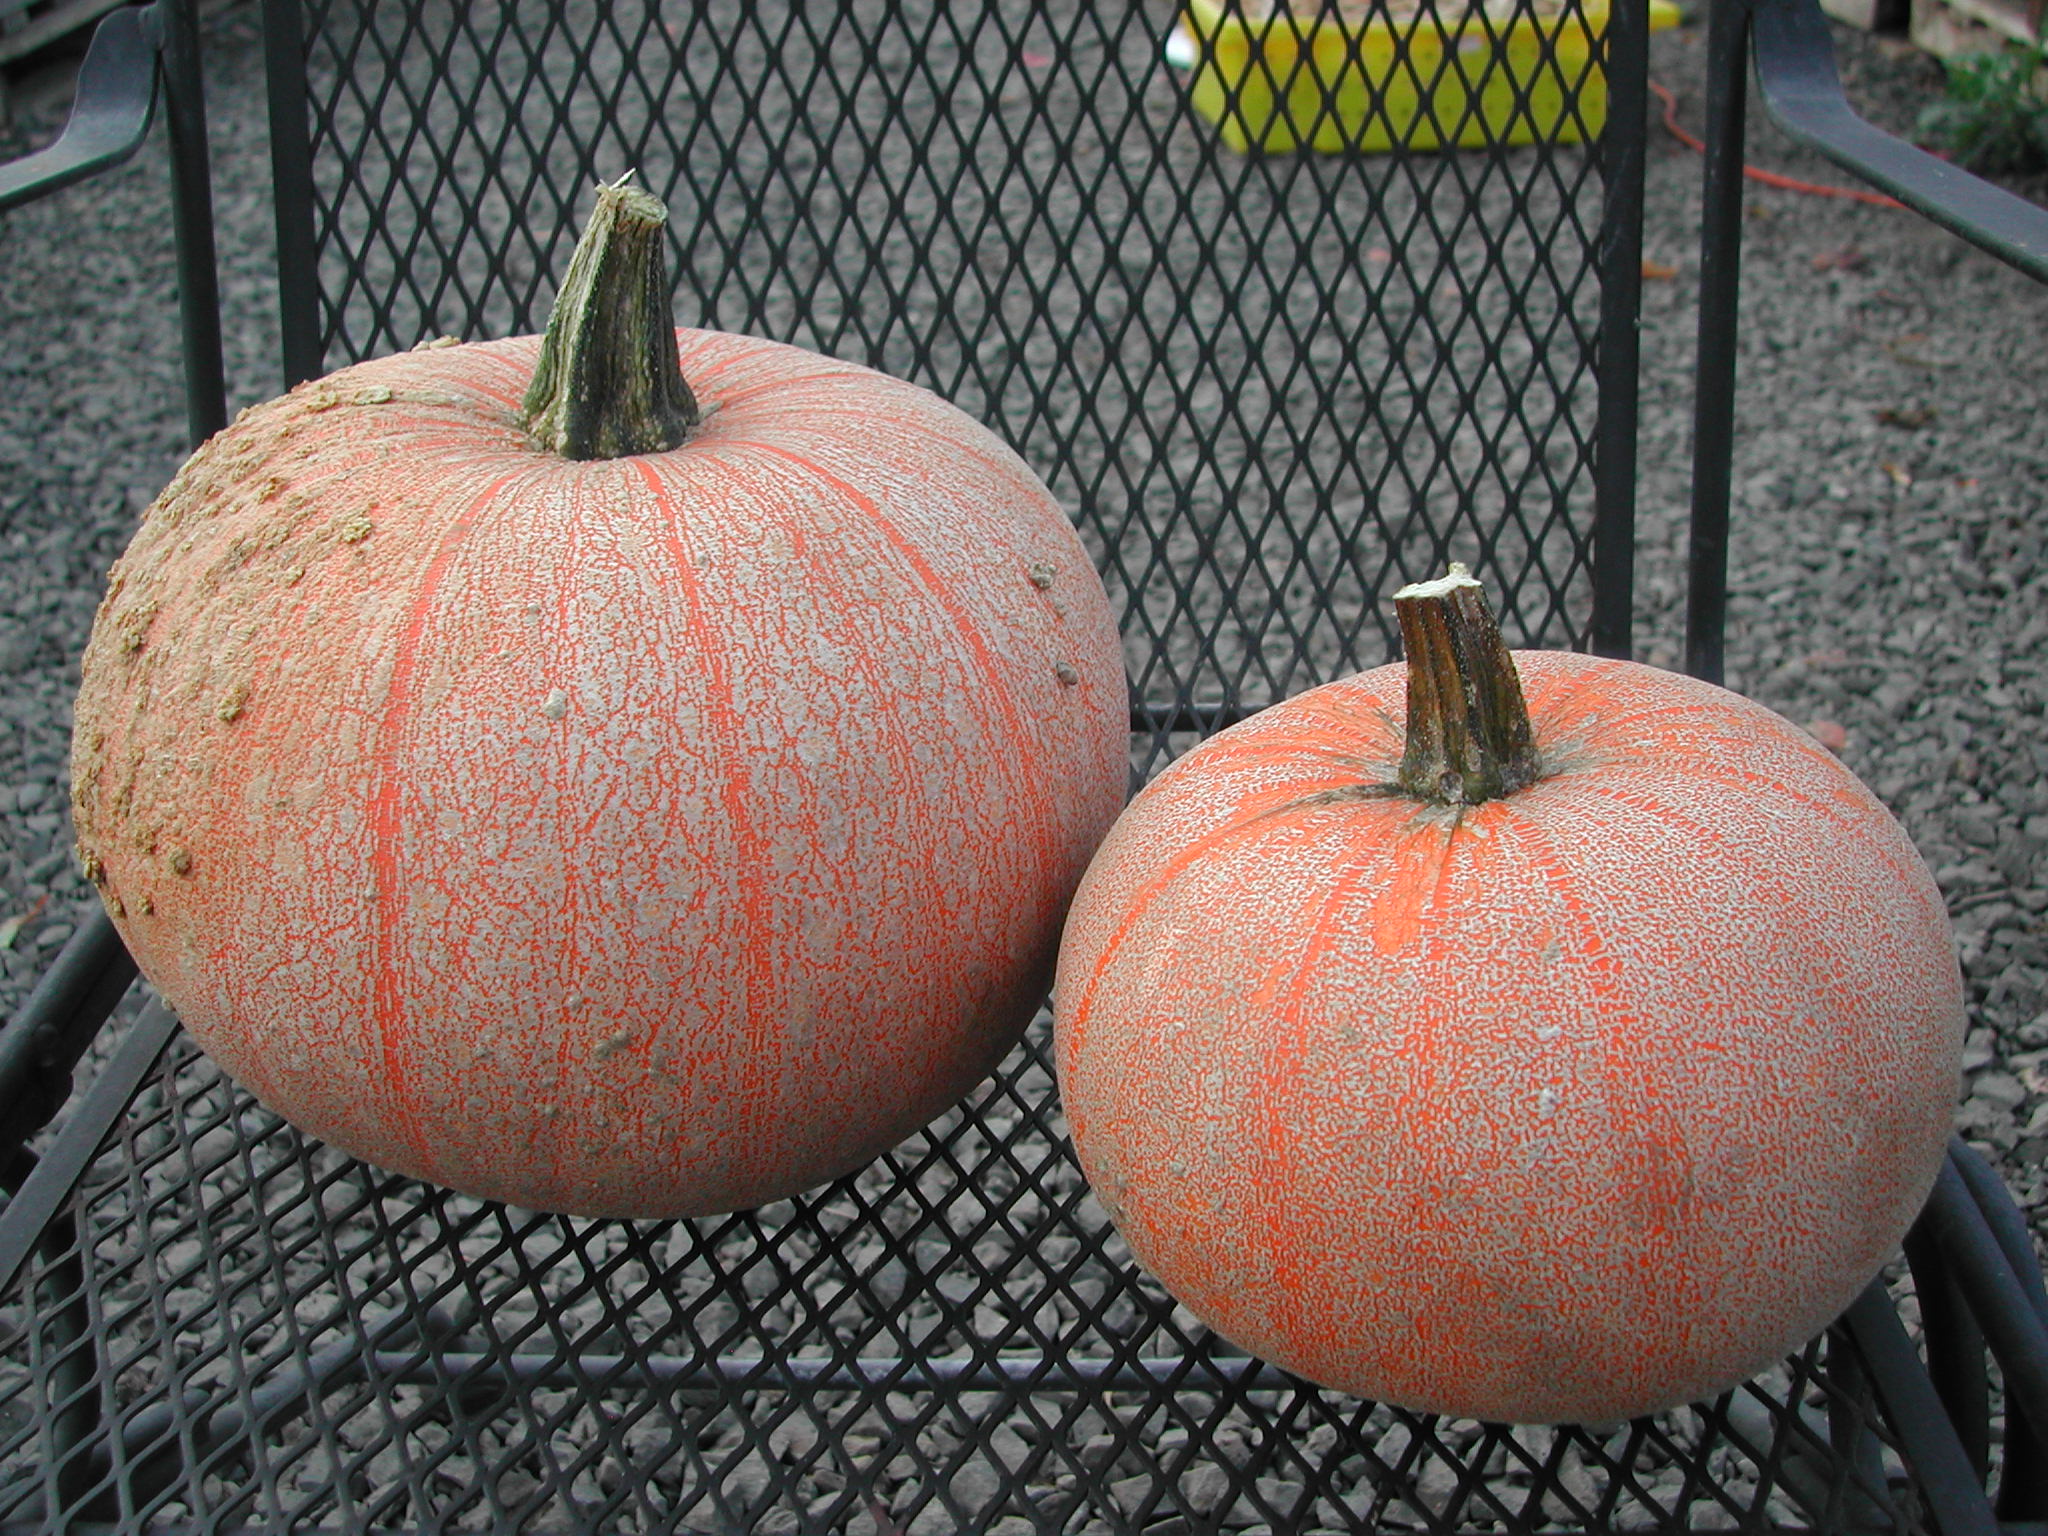
Unfortunately, we haven’t been trapping or working on the voles and they are getting into everything. Today, I was harvesting the pumpkins and squash, and discovered that more than half of the Rouge vif d’Etampes pumpkins and the acorn squash had been nibbled by the voles. Sometimes it is just one little bite, but they are then contaminated and I can’t sell them. I would rather they just eat the whole thing. Fortunately, I have seen a hawk a (red tailed hawk?) hanging around the fields. I am hoping it is getting some good hunting in.
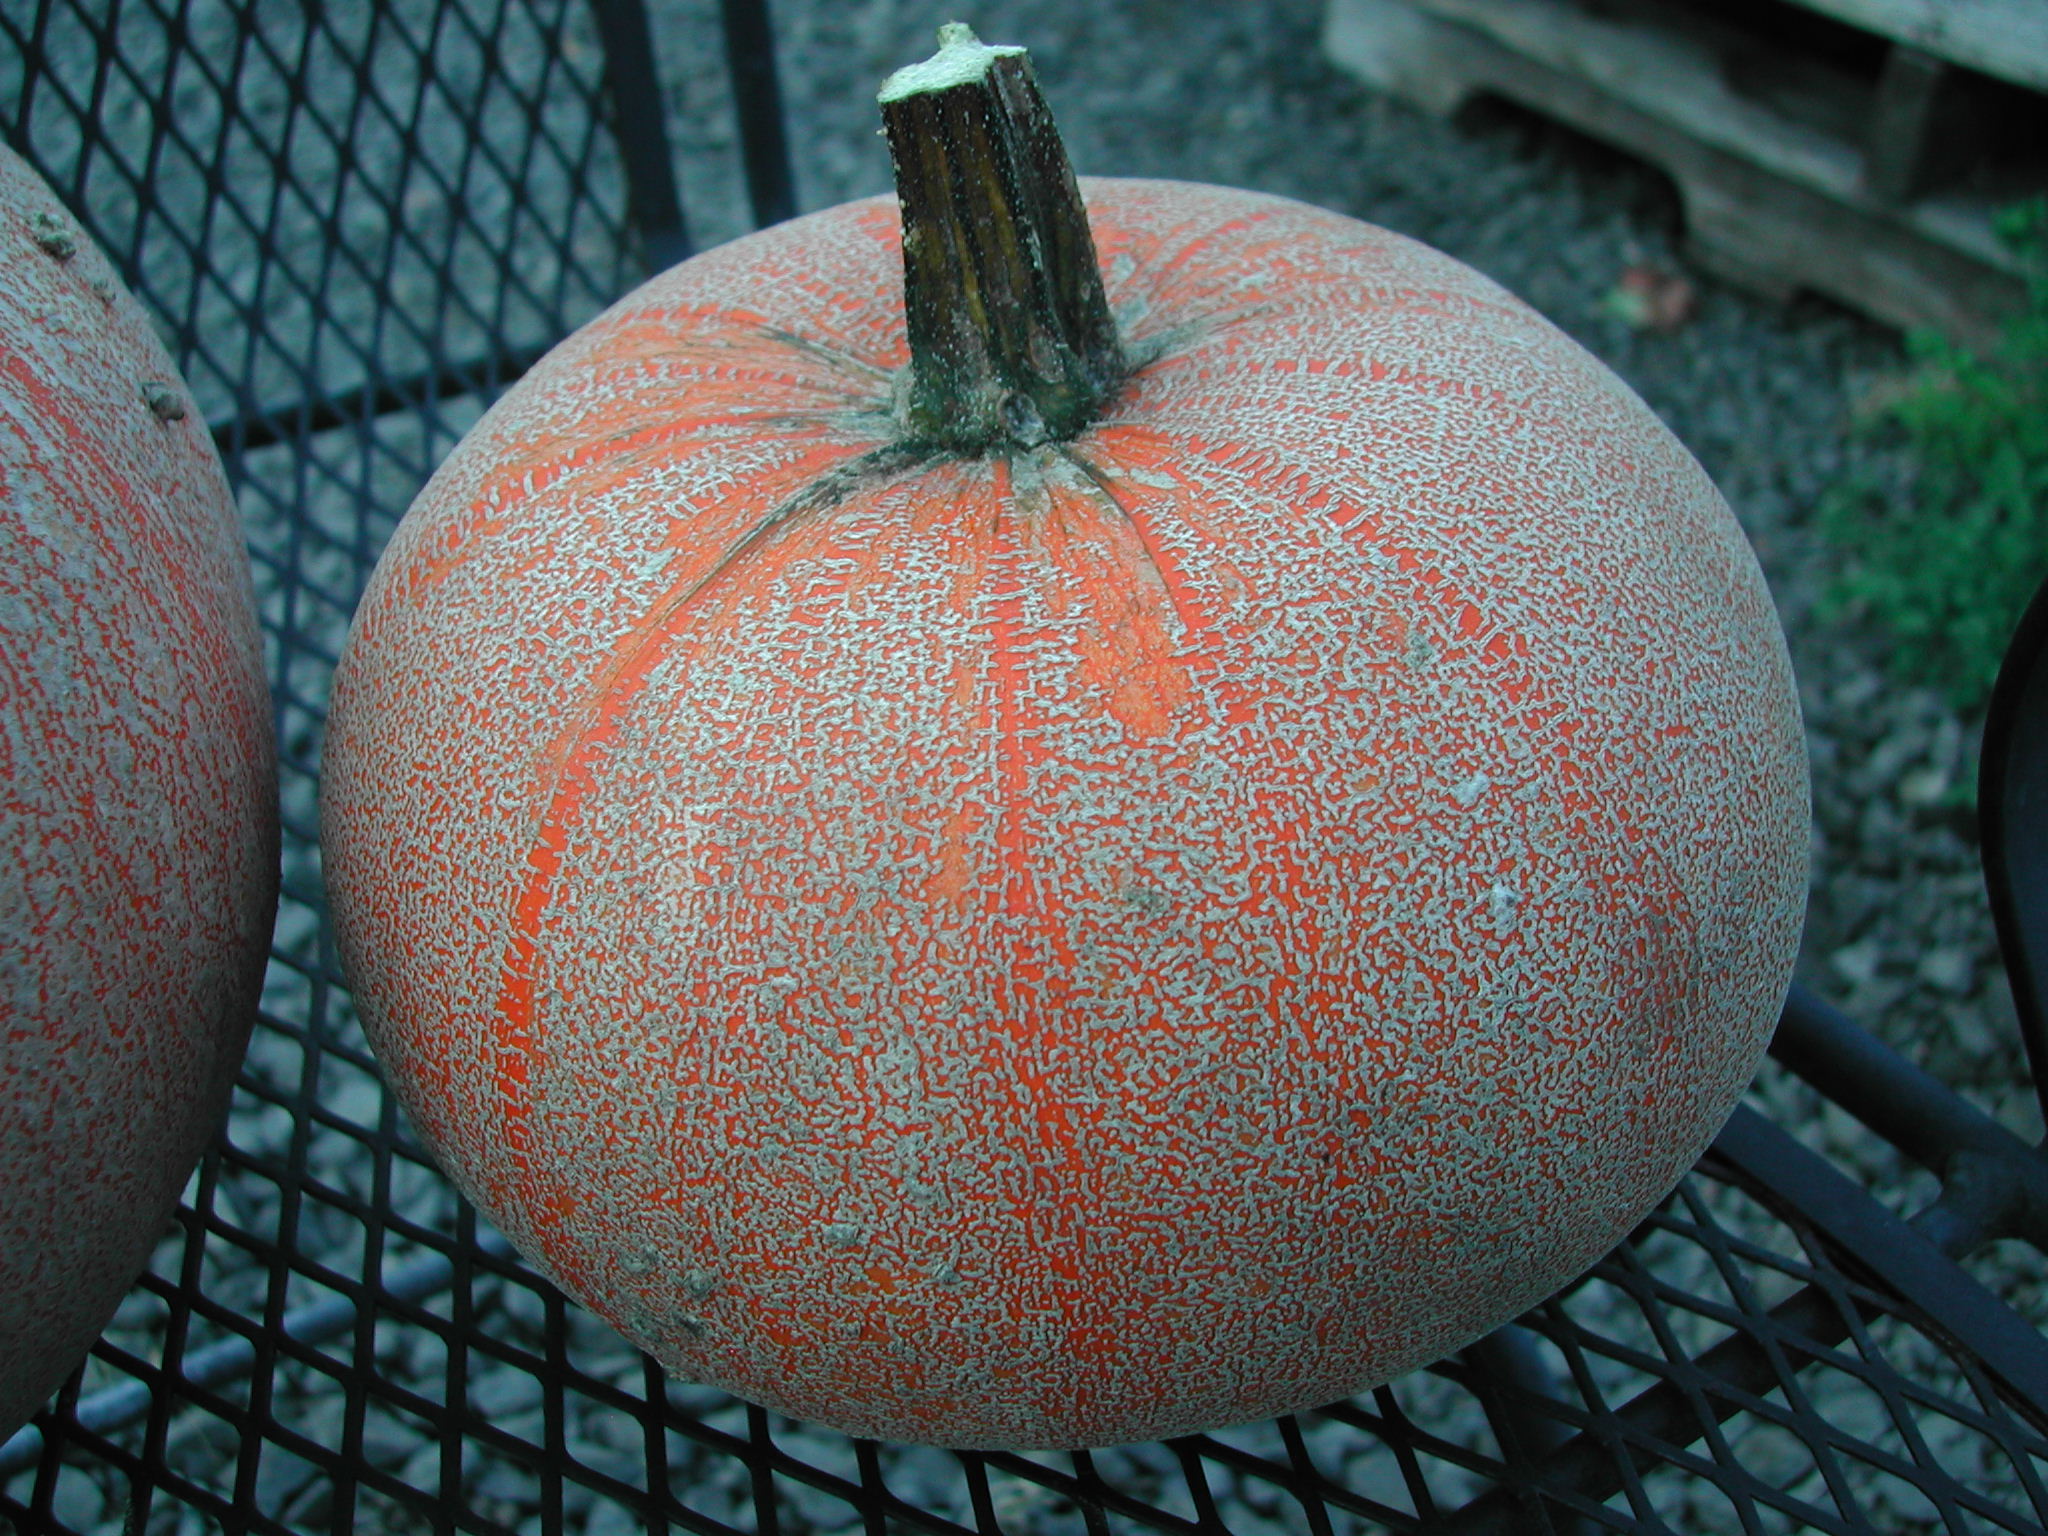
A Winter Luxury pie pumpkin, but good for more than just pie
Despite the voles, there are still lots of pumpkins and winter squash for us humans to eat. So, up next are some recipes. Pumpkins and winter squash can be used interchangeably in recipes, as long as the pumpkins are the eating kind and not the carving kind. All the pumpkins I grow are for eating, with one slight exception: the Kakai Hulless. The Kakai Hulless has good seeds for eating, but the flesh is not good to eat. Different varieties of pumpkins and winter squash do have variations in flavor, sweetness and texture (dry or moist or more or less smooth), which may give them a slight advantage or disadvantage in different types of recipes.

A Kakai Hulless pumpkin
Since I mentioned the Kakai Hulless, I’ll start with that. It has hulless seeds, which are perfect for roasting. This is the first year I have grown this pumpkin and I haven’t had a chance to try roasting the seeds yet. To start, separate the seeds from the pulp. Rinse them under running water in a strainer. You can then soak them in a brine solution for a couple hours (half teaspoon of kosher salt per cup of water) or you can boil them in water for 5-10 minutes. I haven’t tried the brining, but that might add some good salt flavor to the seeds. I have boiled them, but that was not with hulless seeds, so I am not sure how it will work with them. (Update: I tried boiling the hulless seeds and I have concluded it is overkill. I think it works with regular seeds, but these don’t need it. I also brined some, but haven’t finished roasting them yet.) After brining or boiling, rub the seeds under water to get off any remaining pulp. Drain and pat dry and you’ll be ready to roast and season. (These methods came from Mother Earth News and the More-With-Less Cookbook.)
Seed Snacks I– from the More-With-Less Cookbook (This is my go-to recipe, because it is quick, easy and tastes great)
For each cup of prepared seeds, combine and mix with 1 T melted butter and 1 t Worcestershire sauce. Sprinkle with salt or seasoned salt. Bake at 350 degrees for 30 minutes or until nearly dry.
Sweet and Spicy Pumpkin Seeds from Martha Stewart
Bake 1 cup of prepared pumpkin seeds on a parchment lined baking sheet in a 250 degree oven until dry, stirring occasionally, about 1 hour. Let cool.
In a medium bowl, combine 3 T sugar, 1/4 t coarse salt, 1/4 t cumin, 1/4 t cinnamon, 1/4 t ginger and a pinch of cayenne pepper (to taste). Heat 1 1/2 T peanut oil in a large nonstick skillet over high heat. Add pumpkin seeds and 2 T sugar. Cook until the sugar melts and the pumpkin seeds begin to caramelize, about 45 to 60 seconds. Transfer to the bowl with spices and stir well to coat.
Sweet & Spicy Pumpkin Seeds from 101cookbooks
Preheat oven to 375 degrees. In a medium sized bowl, whisk together 1 egg white, 1/4 c sugar, 1/2 t cayenne pepper and 1/2 t sea salt. Add one cup of prepared pumpkin seeds and toss well. Drain off any excess egg white (using a strainer) and place seeds in a single layer across a baking sheet. Bake for about 12 minutes or until seeds are gold. Sprinkle with more sugar and cayenne pepper and salt, if needed, when they come out of the oven.
Curried Pumpkin Seeds from 101cookbooks
Follow the recipe for Sweet & Spicy Pumpkins Seeds above, but use 2 t curry powder in place of the sugar and cayenne pepper.
I have a lot more pumpkin and winter squash recipes to share, but I am going to stop here for now. If you have a favorite way to roast seeds or a favorite pumpkin/squash recipe, please share it in the comments!

